Everyone knows that we can convert VMWare virtual machines to Hyper-V with the System Center Virtual Machine Manager 2012 or 2008 R2 through the virtual-to-virtual (V2V) machine conversion process. How to do that you can read here.
But, what to do if we don’t have VMM?
For example; I need convert a few virtual machines from VMWare Workstation (XP, Server 2003 and one Server 2008 R2) to Hyper-V and that VMs I need import on my laptop with Hyper-V role and Windows 8 RP installed.
Here is a small how to:
Step 1.
Uninstall VM tools from your virtual machine. Log into virtual machine, open Control Panel –> Programs and Features and click Uninstall.
Step 2.
Shutdown the virtual machine!
Usually your VMWare VMs are based on SCSI drives, because VMWare recommends SCSI, and the operating systems are Windows XP, Windows Server 2003 or earlier then you have to add then you have to add the IDE driver to your VM before you shut it down in VMWare.
Otherwise you will end up with a converted VM that starts up in Hyper-V with a blue screen of death (BSOD) and 0x0000007B – “Inaccessible Boot Device” error. This is due to the fact that your converted VM will have no Primary IDE Channel and Hyper-V will presume that your converted disk is IDE type and located on the Primary IDE Channel.
Doing a Windows Repair Install can fix the 0x7B Inaccessible Boot Device error – but it’s both time consuming and the result might not be good.
Please note that adding a temporary IDE disk to your VM is not necessary with VMs running Windows 7 or Windows 2008 R2 – they seem to detect the Primary IDE Channel during initial boot phase.
Step 3.
Add a new IDE disk drive to your VM. Make sure that you select “Adapter: IDE 0 Device: 0” under “Virtual Device Node” while creating the new disk (otherwise you might end up with yet another SCSI disk).
Step 4.
Boot up your virtual machine with both drives connected and check that it detects your new IDE drive (along with a primary IDE channel and a disk device driver). You should be able to see the new drive as “not initialized” in Disk Management.
Step 5.
Power off your virtual machine and remove the newly created IDE disk from your VM (you can delete it from disk as well). Do not power on your VMware Machine again!
Step 6.
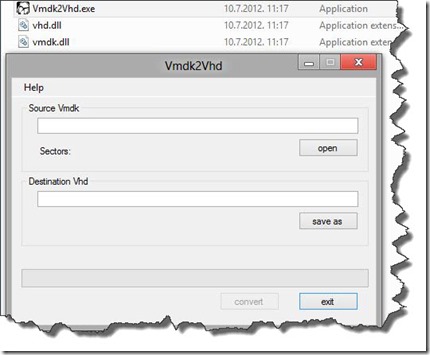
Now convert your VMDK file to VHD format using the Vmdk2Vhd utility that can be downloaded from http://vmtoolkit.com.
Step 7.
Create a new Virtual Machine in Hyper-V. Make sure you select “Use an existing virtual hard disk” and select the VHD file that you just created.
Step 8.
Power it on, and reboot when prompted, also check device manager, and do another reboot.
Step 9.
Check that all your applications and services are running.
NOTE: As I mentioned before, If you have Windows Server 2008 R2 or Windows 7 VMs then it’s not necessary to add a temporary IDE disk during migration…
Enjoy migrating to Hyper-V, the best virtualization technology ever ![]() .
.


Best virtualization technology ever? I have been working with HyperV and its competitiors for the last 4 years, and it’s NOT the best virtualization technology, but the most convenient for Microsoft clients.
Everyone can have your own opinion! I’m Microsoft fan/user and for me this is the best virtualization technology ever. For someone else another vt is the best… Also, sometimes I use VMware, Citrix and VirtualBox to compare with Hyper-V and every virtualization platform has good and bad side, including Hyper-V!
As Long Hyper-V dont Support USB devices, its not useable for me and our Company
Hi Cosmo,
You can use USB device with few third-party tools.
Thanks a lot, this works for me. I’ve a VM GUST with 2003 Server in VMWARE Server 2.0.1 and with VMDK2VHD 1.0.13, I’ve just V2V to my new HYPERV 2008 R2 Server. Many thanks again.
Hi Fabrizio,
I’m glad that can help ;)
THANK YOU EVERY MUCH!!!! After 10 hours of work and Google finally shows me your post… :)
Thanx! Your advice helped me to migrate Windows Server 2003 SCSI VM to Hyper-V. Very gratefull!