Last week I received a request from one of our customers about the options for automatic deployment of TeamCompanion to end users. In this blog post I would like to explain and show you how this can be achieved using System Center 2012 R2 Configuration Manager. As always, I’ll lead you through the procedure using lots of pictures :) .
Which prerequisite do we need to start our procedure? An Active Directory, the System Center 2012 R2 Configuration Manager, a couple of domain members, and goodwill.

Additionally, your developers need to prepare appropriate packages as follows:
1. SQLSysClrTypes.msi (download from here)
2. ReportViewer.msi (download from here)
3. Ekobit.TeamCompanion.Installer.exe
4. TeamCompanionSetup.exe
The order of the packages is important, so please create exactly in the order stated above.
If you don’t know how to create Applications and Packages here is a guide.

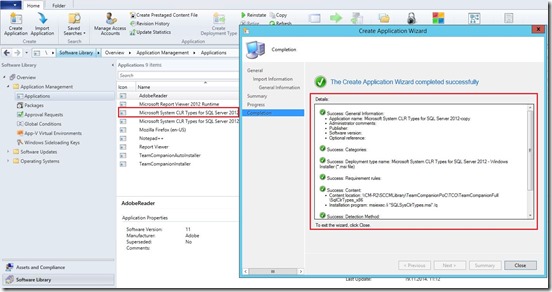
Do the same for the ReportViewer.msi, Distribute Content and Deploy applications.
Now we need to create three TeamCompanion packages with this order:
– TeamCompanionInstaller.exe
– TeamCompanionSetup /S /C (where /S mean silent and /C is for a user)
– TeamCompanion /S
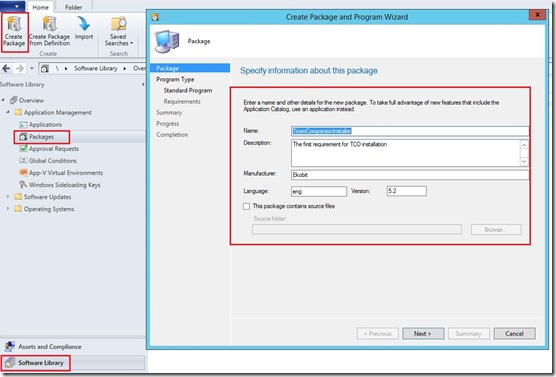
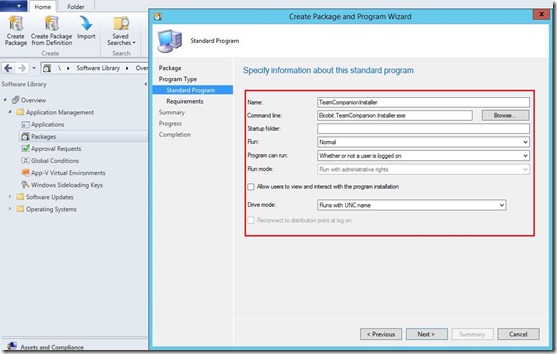
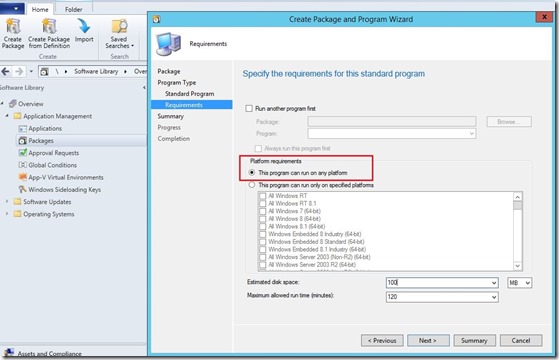
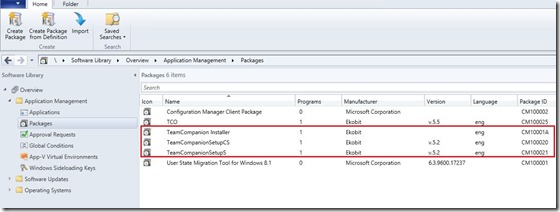
Do the same for the rest of packages, Distribute Content and Deploy applications.
After you have prepared all this, you are ready to implement your automatic deployment of TeamCompanion
Step 1.
Open the System Center 2012 R2 Configuration Manager console and go to Software Library|Applications and create two applications (Microsoft System CLR Types for SQL Server 2012 & Report Viewer) like in the picture.

After you have created Applications, you need to Distribute Content and you need to Deploy applications to the selected clients in the environment.

Step 2.
Create three packages (TeamCompanionInstaller.exe, TeamCompanionSetup /S /C and TeamCompanion /S).

You are finished on the System Center 2012 R2 Configuration Manager side. Let’s look the client side now!
On the client side, Outlook 2013 and Team Explorer 2013 must be installed to be able to push complete package installation of TeamCompanion.

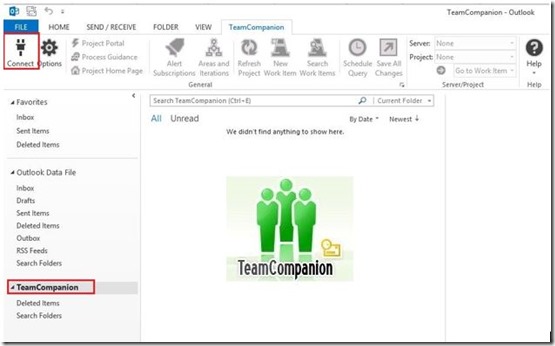
Finally, open Outlook to access TeamCompanion features, connect to your Team Foundation Server and enjoy ;)
For more information about TeamCompanion please visit our web page www.teamcompanion.com
Enjoy the day ;)
Cheers,
Romeo
![]() !
!

![]() .
.


