Hi to all! In this blog post I’ll describe how to install Hyper-V Role and how to configure Virtual Switches with PowerShell.
With PowerShell we are faster than with GUI, especially if we do in enterprises. And, of course, PowerShell is the coolest then GUI is ;).
Step 1.
Open PowerShell as administrator and type command below and press Enter:
Install-WindowsFeature –Name Hyper-V -IncludeManagementTools -Restart
After the server restarts open command prompt and type virtmgmt.msc. Hyper-V console will appear.
Step 2.
Now we need to configure virtual switches. On the Hyper-V host machine I have four physical network adapters. One network adapter is dedicated for Hyper-V host management and the other three will be for a virtual machines. All three network adapter will be external virtual switches.
First I want see which network adapter have available on the Hyper-V host.
Open PowerShell as administrator and type command:
Get-NetAdapter

I’ll use Ethernet 2, 3 and 4 as virtual switches on the Hyper-V host.
Step 3.
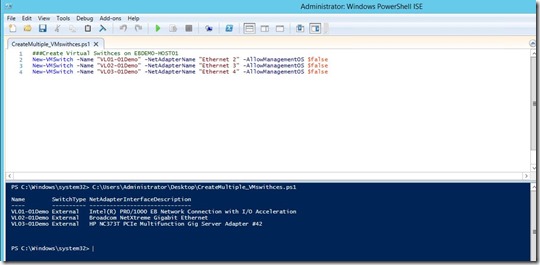
Open PowerShell ISE as administrator and type following commands:
New-VMSwitch -Name “VmSwitch name” -NetAdapterName “Physical NIC Name“
-AllowManagementOS $false
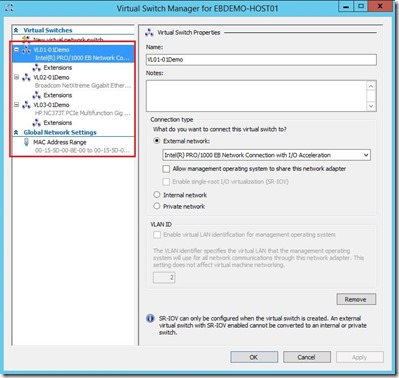
Now we have Virtual Switches on our Hyper-V host.
We can see Virtual Switches when open Virtual Switch Manager console.
This is very simple PowerShell usage, but I hope that it will help someone ;)
If we want to create Virtual Switches to multiple Hyper-V hosts or if we want to do something else with Virtual Switches just need to use different syntax in PowerShell.
Enjoy the day!


Pingback: TechCenter - Blog
Pingback: Dell TechCenter
Pingback: Install the Hyper-V Role in Windows Server 2012 R2, configure Virtual Switches with PowerShell - Minh Thang's Blog