I believe in Hyper-V!

AdministrationCategory Archives

Microsoft Hyper-V Server 2012–installation and configuration

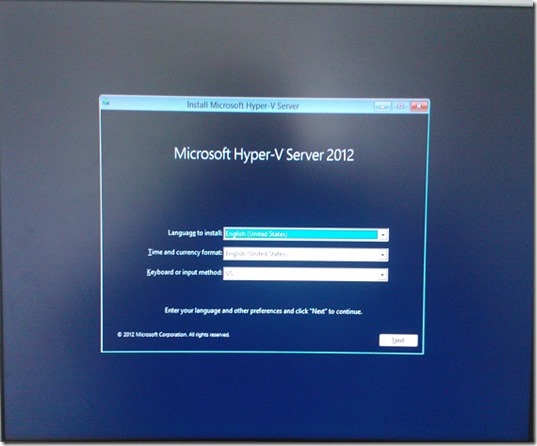
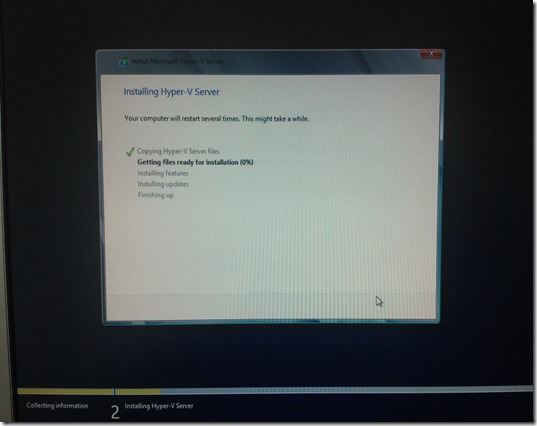
I this blog post I’ll describe how to install and configure Microsoft Hyper-V Server 2012 from the scratch.
Why I chose to use Hyper-V Server 2012 in my production environment?
1. It’s free!
2. Less maintenance!
3. We don’t need to restart the host so often for the updates!
4. Performance and security reasons!

In this scenario I have HP ML 350G6 with 2 CPUs 32GB of RAM and 3TB disk.
HP have a great tool called HP SmartStart CD with integrated drivers and other tools required for server management, but in this case doesn’t work because WS 2012 and Hyper-V 2012 is not covered. I used this tool to create RAID array.

2

How do I integrate the drivers, (network, storage, etc…)? I used Windows Assessment and Deployment Kit software.

8

10

11

After a very short time, my Hyper-V Server 2012 is up and running.

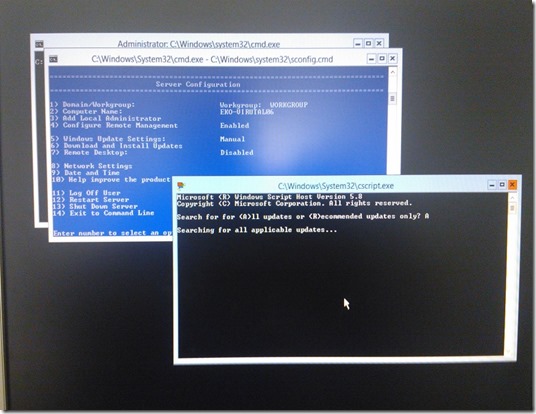
When Hyper-V Server 2012 console appears you can to configure Domain, Computer Name, Remote Management, Network Settings and so on….
If you don’t like command line you can use Hyper-V management console or even better Virtual Machine Manager console to connect to your Hyper-V Server 2012.
Of course, there are third-party tools, like 5nine, vtUtilities… that can maintain Hyper-V Server remotely.

Few words about Hyper-V Server 2012.
Hyper-V Server is a dedicated stand-alone product that contains the hypervisor, Windows Server driver model, virtualization capabilities, and supporting components such as failover clustering, bud doesn’t contain the robust set of features and roles as the Windows Server operating system.
Differences between Microsoft Windows Server 2012 with Hyper-V role installed and Hyper-V Server 2012:
– There is no GUI. You use PowerShell, SConfig, or remote administration to manage the machine.
– There are no free virtualization rights to install Windows Server in guest OS’s on this machine. This means it is good for labs, VDI, Linux hosting and upgrading older hosts without SA.
– It is stripped down so it is just a Hyper-V host and nothing else.

I hope that you will enjoy in Windows Hyper-V Server 2012 Winking smile

Convert VHD to VHDX with Hyper-V manager in Windows 8

After few turbulent weeks and rehabilitation I finally have a time to write blog post. For the beginning of “my new life” and my second birthday this will be an “light” post Winking smile. For those how don’t know, before eleven days ago I had two heart attacks in one day, luckily without injuries.

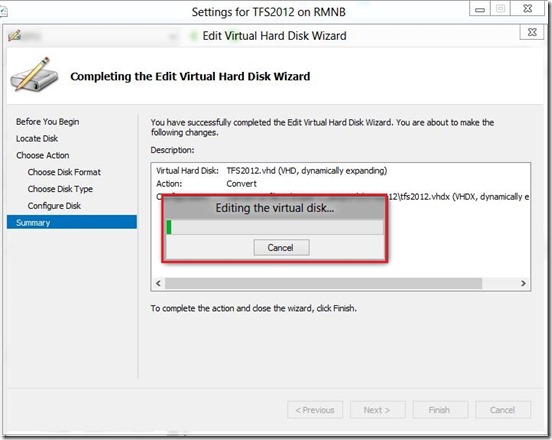
So, let’s begin. In this blog post I would like to explain how to convert .vhd to .vhdx with Hyper-V manager in Windows 8.

First, few things about what is .vhdx I what benefits we get.
VHDX is new virtual hard disk format in WS 2012 and Windows 8. In many ways, VHDX disks offer superior performance, capacity and reliability over Hyper-V’s legacy Virtual Hard Disks.
With the VHDX format we able to create much larger virtual hard disks. Old Hyper-V had a 2 TB limit to VHD’s, but VHDX files have up to a 64 TB capacity. Also, protection against data corruption during power failures my logging updates to the VHDX metadata structures as well as improved alignment of the virtual hard disk format to work well on large sector disks.
The VHDX format also provides the few more features such as; large block sizes for dynamic and differencing disks, which allows these disks to attune to the needs of the workload. The ability to store custom metadata about the file that the user might want to record, like operating system version or patches applied, and so on…

Many of us have virtual machines created with old Hyper-V and if we want to use the new features, we need convert .vhd to .vhdx.
How to do that? This is very simple process and we have two ways to doing that. Over Hyper-V manager GUI and with PowerShell.

Convert .vhd to .vhdx with Hyper-V manager GUI:

Step 1.

1

Step 2.
2

Step 3.
3

Step 4.
4

Step 5.
5

Step 6.
6

Step 7.
7

And after few simple steps we have converted .vhdx.

8

Convert .vhd to .vhdx with PoweShell:

If you prefer PowerShell follow this few steps. Open PowerShell as Administrator and enter few commands like in pictures below.

12
13
14

Enjoy in the new .vhdx features and benefits.

NOTE: You can convert a VHDX to a VHD. But keep in mind and make sure that the VHDX is not bigger than 2TB.

Also, keep in mind that the virtual hard disk will be unavailable during the conversion process. It will create a new virtual hard disk file and delete the old one. As such, you will need enough physical disk space to temporarily accommodate two copies of the virtual hard disk that you are converting.

You can read more about how to convert VHD to VHDX on the links below

Aviraj Ajgekar
Thomas Maurer

Quote from the Petri by Aidan Finn (http://www.petri.co.il/convert-vhd-file-into-vhdx-file.htm#)

“There is one more step that you might consider: When you create a new VHDX file (not converted) it has a physical sector size of 4 K. A converted VHDX file has a physical sector size of 512 Bytes. You can change the physical sector size of a converted VHDX by running this piece of PowerShell before you power up the virtual machine:

set-vhd d:\VM01\Disk0.vhdx -PhysicalSectorSizeBytes 4096

Now you have a virtual machine that is using the best kind of virtual machine storage, the VHDX format virtual hard disk.”


Enjoy in Virtualization Smile

Convert VMWare image to Hyper-V and stay there forever ;)

Everyone knows that we can convert VMWare virtual machines to Hyper-V with the System Center Virtual Machine Manager 2012 or 2008 R2 through the virtual-to-virtual (V2V) machine conversion process. How to do that you can read here.

But, what to do if we don’t have VMM?
For example; I need convert a few virtual machines from VMWare Workstation (XP, Server 2003 and one Server 2008 R2) to Hyper-V and that VMs I need import on my laptop with Hyper-V role and Windows 8 RP installed.

Here is a small how to:

Step 1.

Uninstall VM tools from your virtual machine. Log into virtual machine, open Control Panel –> Programs and Features and click Uninstall.

Step 2.

Shutdown the virtual machine!
Usually your VMWare VMs are based on SCSI drives, because VMWare recommends SCSI, and the operating systems are Windows XP, Windows Server 2003 or earlier then you have to add then you have to add the IDE driver to your VM before you shut it down in VMWare.
Otherwise you will end up with a converted VM that starts up in Hyper-V with a blue screen of death (BSOD) and 0x0000007B – “Inaccessible Boot Device” error. This is due to the fact that your converted VM will have no Primary IDE Channel and Hyper-V will presume that your converted disk is IDE type and located on the Primary IDE Channel.
Doing a Windows Repair Install can fix the 0x7B Inaccessible Boot Device error – but it’s both time consuming and the result might not be good.

Please note that adding a temporary IDE disk to your VM is not necessary with VMs running Windows 7 or Windows 2008 R2 – they seem to detect the Primary IDE Channel during initial boot phase.

Step 3.

Add a new IDE disk drive to your VM. Make sure that you select “Adapter: IDE 0 Device: 0” under “Virtual Device Node” while creating the new disk (otherwise you might end up with yet another SCSI disk).
3

Step 4.

Boot up your virtual machine with both drives connected and check that it detects your new IDE drive (along with a primary IDE channel and a disk device driver). You should be able to see the new drive as “not initialized” in Disk Management.

Step 5.

Power off your virtual machine and remove the newly created IDE disk from your VM (you can delete it from disk as well). Do not power on your VMware Machine again!

Step 6.

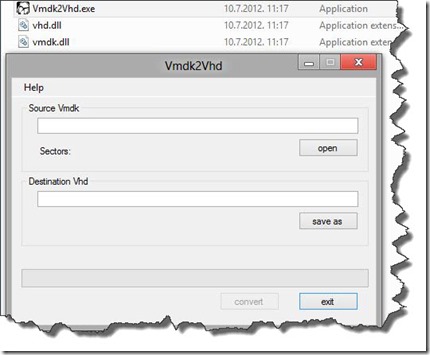
Now convert your VMDK file to VHD format using the Vmdk2Vhd utility that can be downloaded from http://vmtoolkit.com.
1

Step 7.

Create a new Virtual Machine in Hyper-V. Make sure you select “Use an existing virtual hard disk” and select the VHD file that you just created.

Step 8.

Power it on, and reboot when prompted, also check device manager, and do another reboot.

Step 9.

Check that all your applications and services are running.

NOTE: As I mentioned before, If you have Windows Server 2008 R2 or Windows 7 VMs then it’s not necessary to add a temporary IDE disk during migration…

Enjoy migrating to Hyper-V, the best virtualization technology ever Winking smile.