I believe in Hyper-V!

AdministrationCategory Archives

New free eBook: "Microsoft Licensing for Virtual Environments"

Hi to everyone,

IMHO, Microsoft licensing model is the hardest thing for me ;). So, with this free eBook and webinar you can learn how to license Microsoft virtual environment.

Capture

Are you looking to get to grips with Microsoft licensing for virtual environments? Altaro got something special for you!

Altaro asked our very own Hyper-V guru Eric Siron, and Hyper-V MVP Thomas Maurer to take you through the theory and a dozen or so example scenarios to help you gain a solid understanding of Microsoft licensing. We’re offering you two formats:

  • An Altaro webinar, hosted by Hyper-V MVPs Thomas Maurer and Andrew Syrewicze on Thursday, 4th December 2014 at 10am EST / 4pm CET (30-45 mins + live Q&A!)
  • A brand new eBook by Eric, which is available right now!

    Sign up for the webinar here:

    Webinar

    Download your copy of the eBook “Licensing Microsoft Server in a Virtual Environment” here:

    download

    Cheers,

    Romeo

  • Migrate VMware virtual machine to Microsoft Azure with MVMC 3.0

    Dear blog readers, in this blog post I would like to show you how to migrate VMware virtual machine to Microsoft Azure with Microsoft Virtual Machine Converter 3.0. The whole procedure is very simple and straight forward.

    My infrastructure looks as follows
    1. ESXi 5.5 with couple of VMs
    2. Hyper-V host 2012 R2 with MVMC 3.0 installed

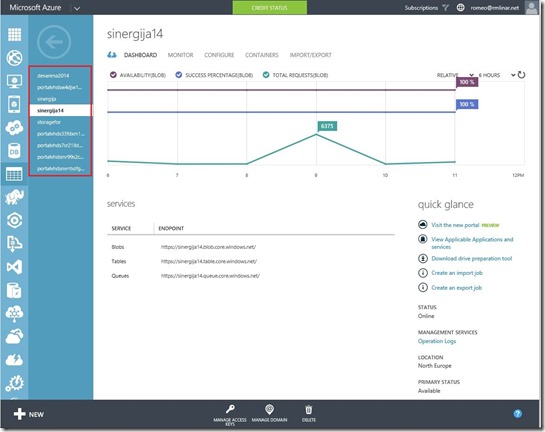
    First what I need is a storage on Microsoft Azure. As you can see on the picture below I have few storages all ready created.
    1

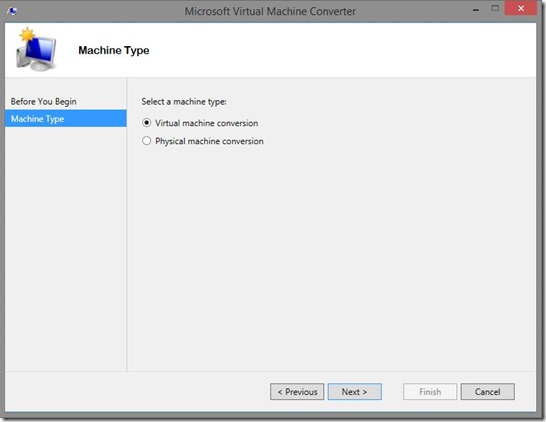
    Now we are almost ready to put VM to Azure ;) Open MVMC 3.0 and follow the steps…
    1

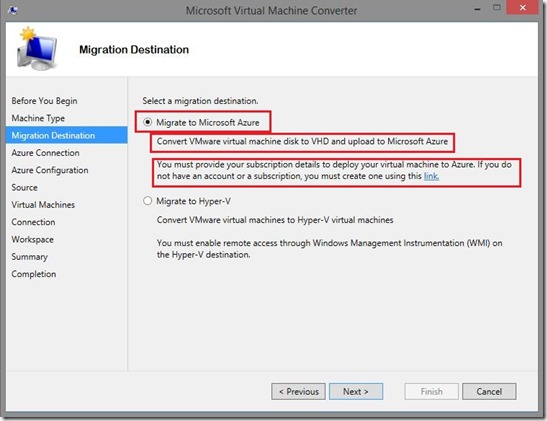
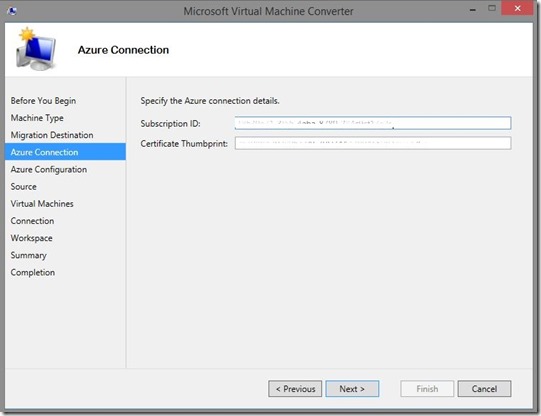
    As you can see on the picture we only can convert VMware virtual machine disk to VHD (not to VHDX) and also, we must provide subscription of Azure account and certificate Thumbprint.
    2

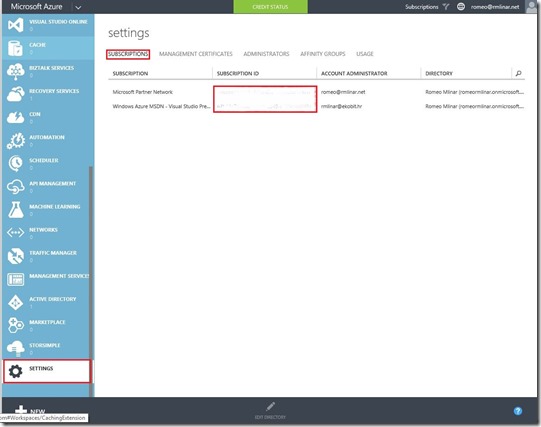
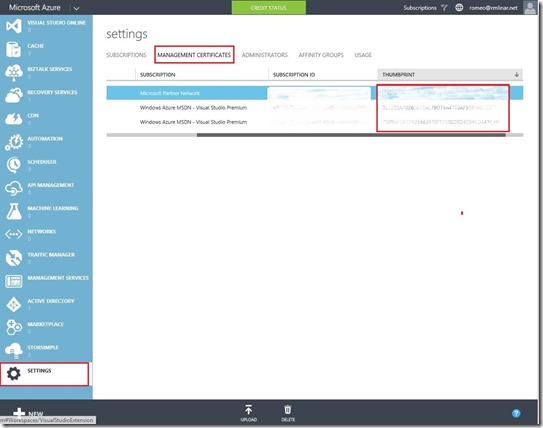
    Open Microsoft Azure console and under Settings you can find Subscription ID and Certificate Thumbprint.
    2
    3

    We can go ahead with migration..

    3

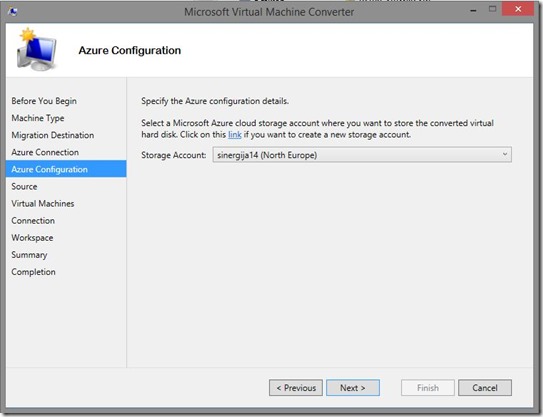
    Choose Storage account…

    4

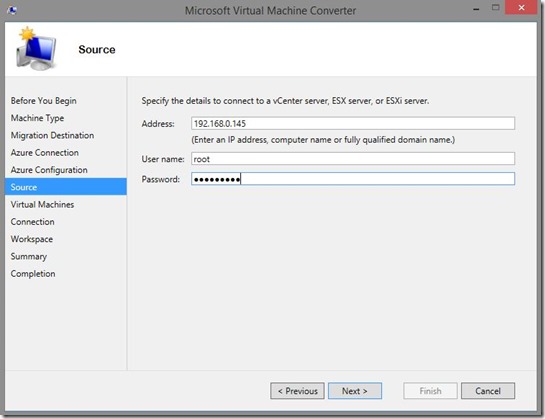
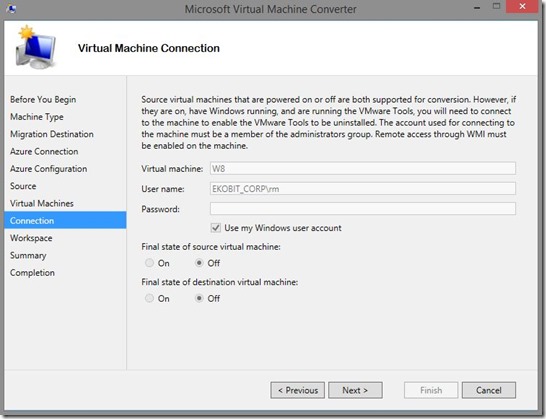
    Enter ESXi server details….

    5

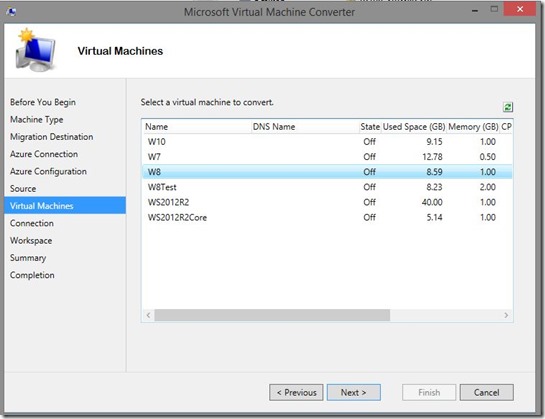
    and select virtual machine for migration/conversion
    6 
    7

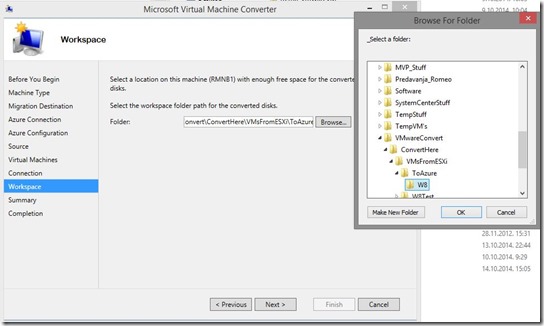
    Choose the place on the Hyper-V host where you want to convert VM
    8

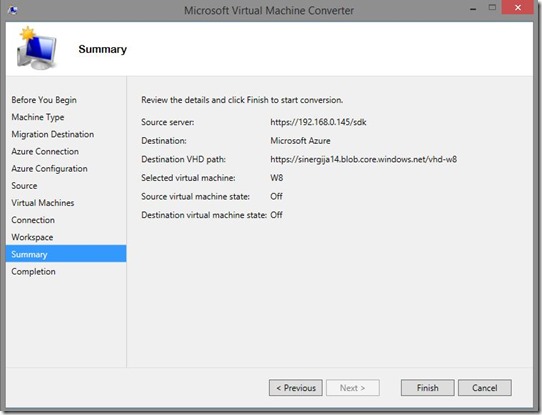
    On the Summary window check details and click on Finish.
    9

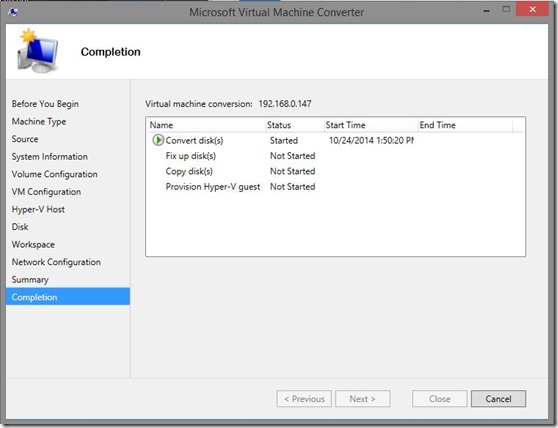
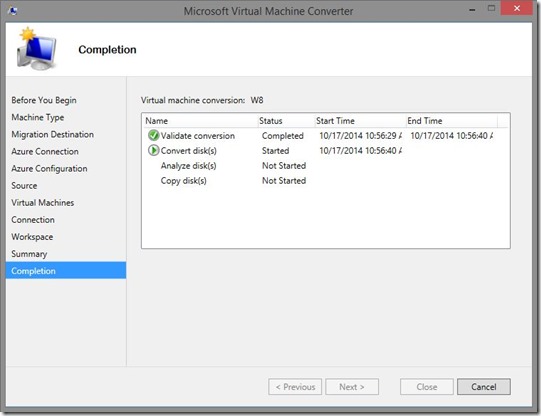
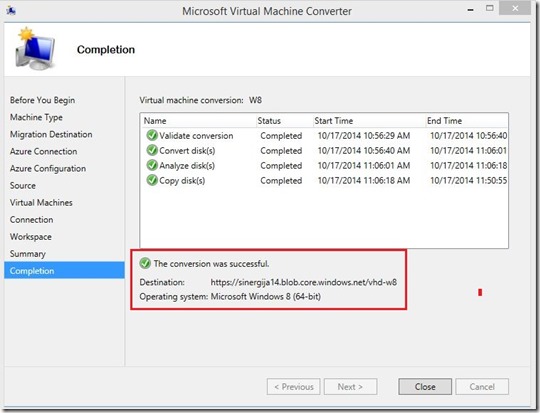
    Conversion will start…
    10

    We are done with conversion and now….
    11

    Logon on Microsoft Azure portal and under created storage you will be see converted .VHD.
    12

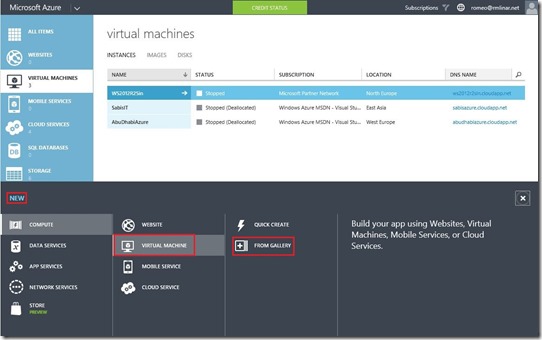
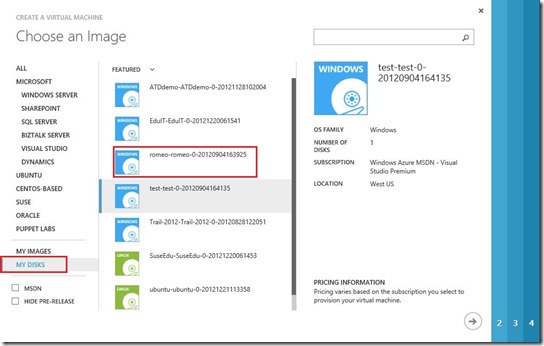
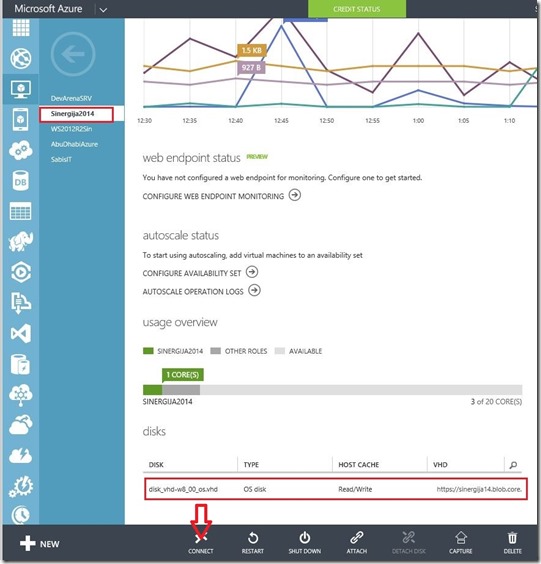
    The next step is to create virtual machine and give her the converted virtual disk.
    13 
    4

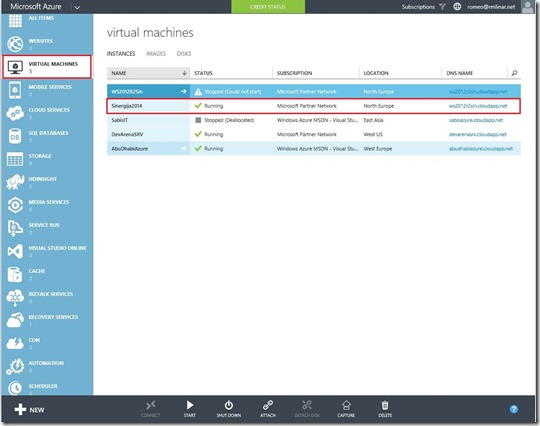
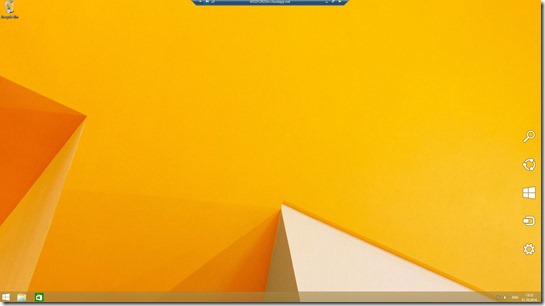
    At the and of conversion process we have Hyper-V virtual machine in the Microsoft Azure.
    1 
    2

    And voila :) We are done!
    3

    Now I have to pack my stuff for the MVP Summit in Redmond. MVP fellows see you there… Can’t wait.

    Enjoy the day and enjoy virtualization :)

    Cheers,

    Romeo

    Convert Physical machine to Virtual machine with MVMC 3.0

    In this blog post I would like to show you how to convert Physical machine to Virtual machine with MVMC 3.0 which you can download from here. In this version of MVMC we can convert physical machine to virtual machine, other features are more or less the same.

    New features in MVMC 3.0

    The 3.0 release of MVMC adds the ability to convert a physical computer running Windows Server 2008 or above server operating systems or Windows Vista or above client operating systems to a virtual machine running on Hyper-V host.

    Here you can read about standard features in MVMC.

    Make sure you have the following pre-requisite on the computer on which you want to run MVMC and they are as follows:
    1. Windows Server 2012 R2, Windows Server 2012, or Windows Server 2008 R2 SP1 operating systems.

    2. Microsoft .NET Framework 3.5 and .NET Framework 4 if you install MVMC on Windows Server 2008 R2 SP1

    3. Microsoft .NET Framework 4.5 if you install MVMC on Windows Server 2012 R2, Windows Server 2012, or Windows 8.

    4. Visual C++® Redistributable for Visual Studio® 2012 Update 1

    5. Enable the Background Intelligent Transfer Service (BITS) feature in Windows Server.

    6. Enable Hyper-V on the destination host

    NOTE: If you don’t enable features mentioned above will get this error:
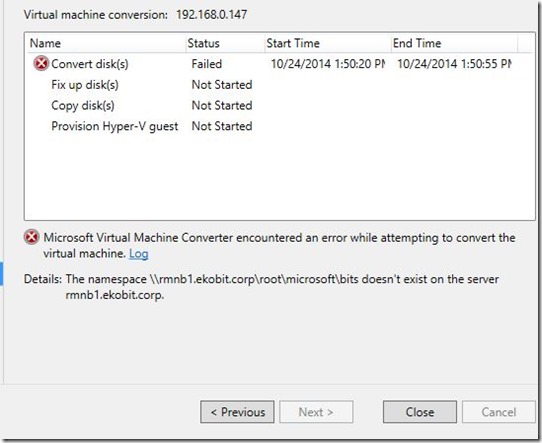
    ErrorImportant

    From the one side I have Physical machine with Windows Server 2012R2 installed on it, and from the other side I have Hyper-V host.

    Here is a pictures guide how to convert ;)
    Start MVMC and click Next
    1 
    On the next screen choose Physical machine conversion
    2

    Enter the name or IP address and credentials of your physical machine under the Source then go ahead

    3

    Click on Scan System to see system information
     4 
    5
    Here we can see Volume Configuration

    6

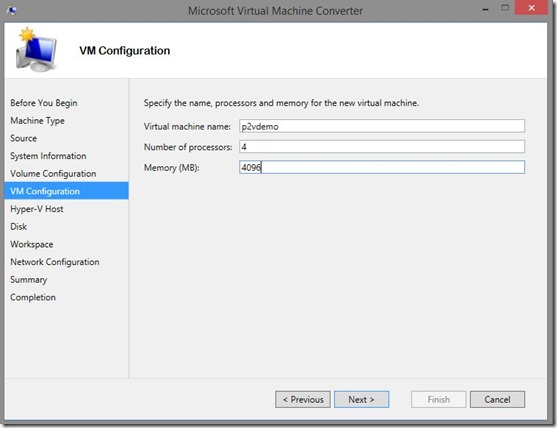
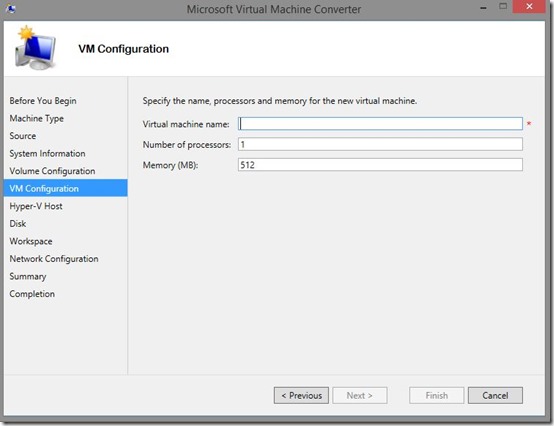
    On the next step we need to enter Virtual machine name, number of processors and Memory
    7
    8

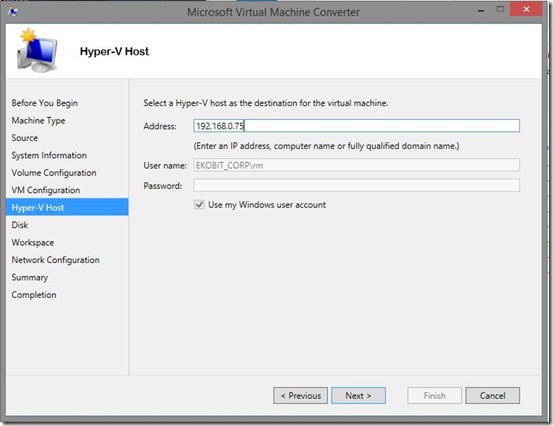
    Here we need to fill Hyper-V host information
     9
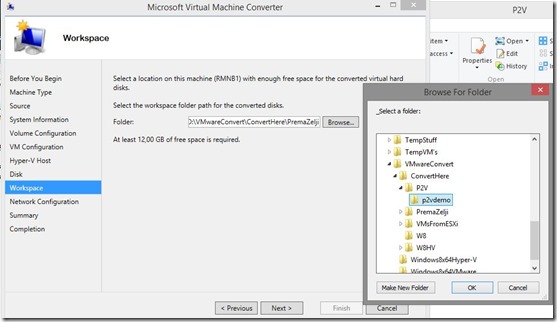
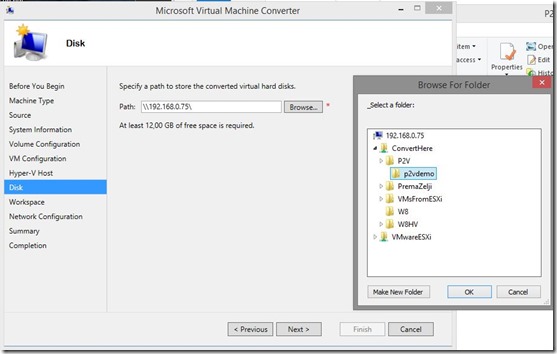
    Then we need to choose virtual machine and workspace location
    10 
    11

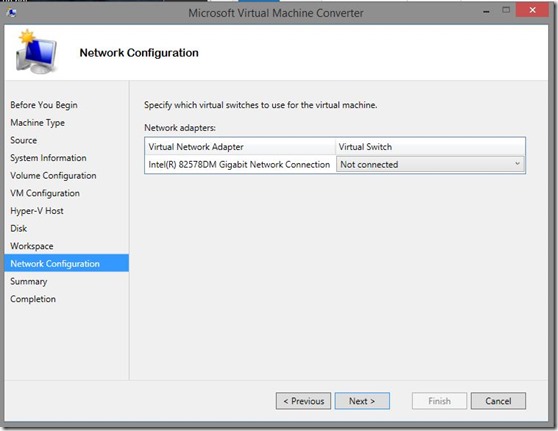
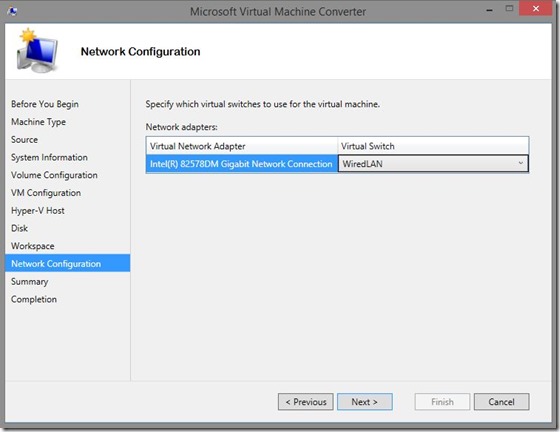
    Then, Network Configuration
    12 
    13

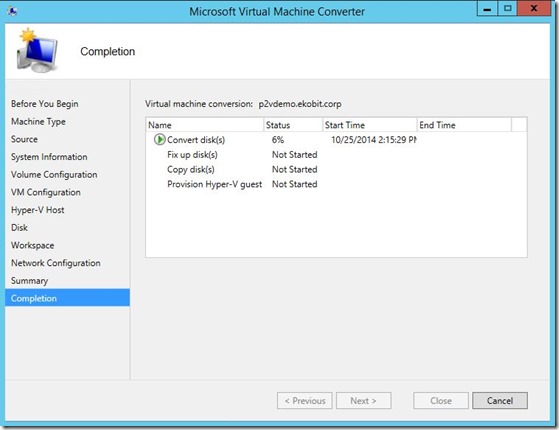
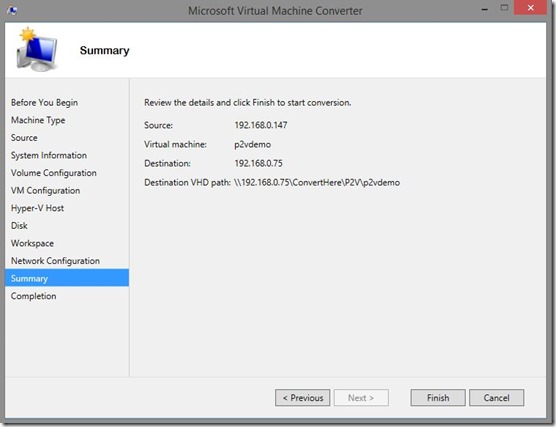
    At the end of the wizard we can see Summary and click on Finish to start conversion
    14 
    15 
    16 

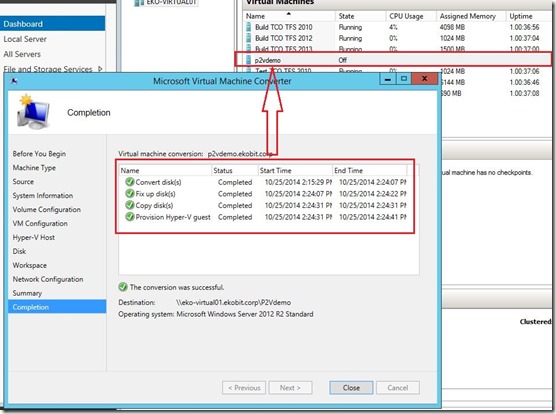
    At the end of the conversion process you can see converted machine
    17

    Enjoy in virtualization :)

    Cheers,

    Romeo