I believe in Hyper-V!

AdministrationCategory Archives

Hyper-V Cluster for the Lab – Part 1

In this blog post I’d like to explain how to configure Hyper-V Cluster using only Microsoft tools.
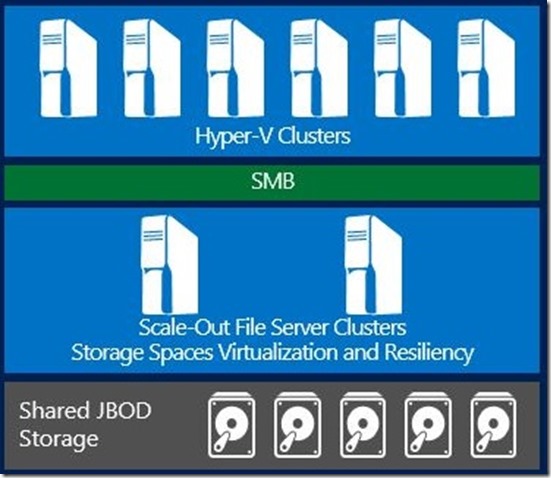
First off all I have to describe my hardware environment, one old PC with a bunch of disks (JBOD), two servers for clustered storage spaces and SOFS and two servers for the Hyper-V cluster. Every physical machine has four network adapters and Windows Server 2012 R2 installed. All servers are a domain members!

At the end lab environment will look like in the picture below
ToJeToSMB

After we prepared hardware let’s go to the software. On every server in the environment I created NIC Team and vSwitches. How to create NIC Team and vSwitches you can read here.

1

Now I need to configure the few major things and that’s Storage Pool, virtual disks (one for the Quorum and one for the Cluster Shared Volume on which will be virtual machines), iSCSI Target on a Storage side and iSCSI Initiators on the Hyper-V hosts side.

Storage Pool and Virtual disks (Storage Server)

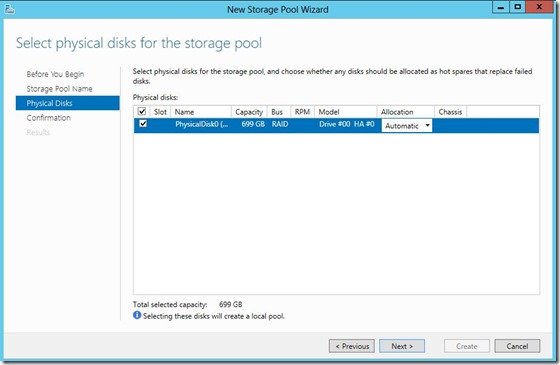
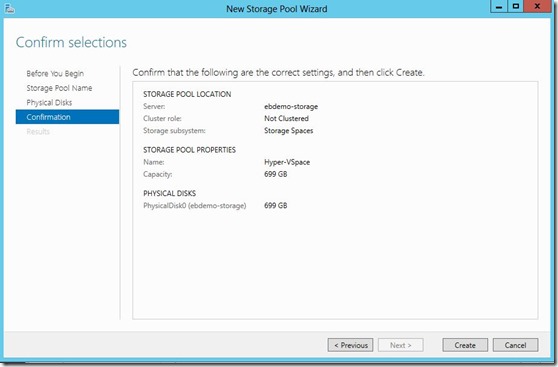
I have one available disk ready and now I’ll be create storage space and two virtual disks from that pool.
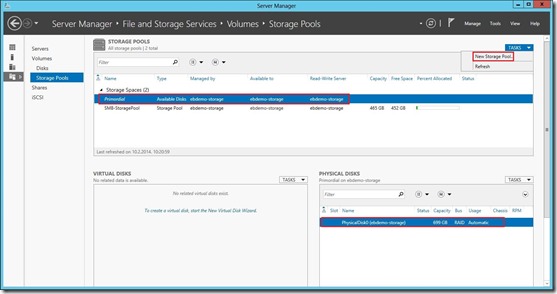
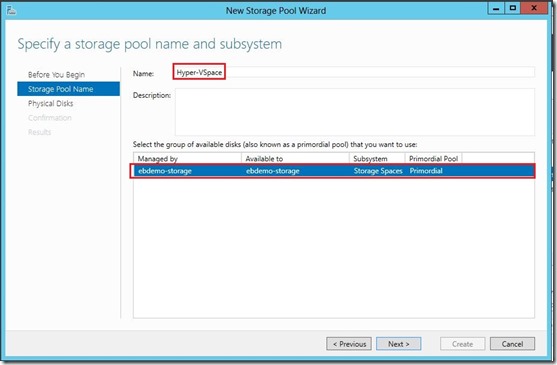
1 1 1 1
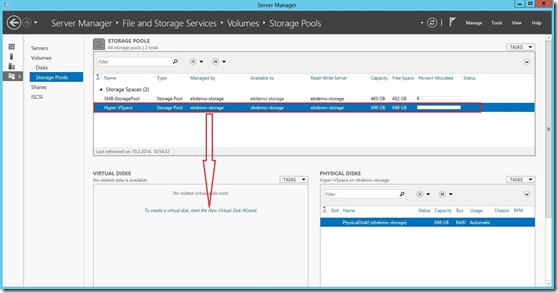
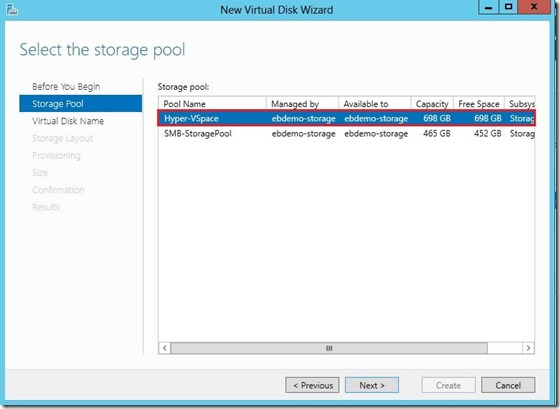
We’re done with Storage Pool and we need to create Virtual Disks

1 
1

The first virtual disk will be for a Hyper-V Cluster Quorum
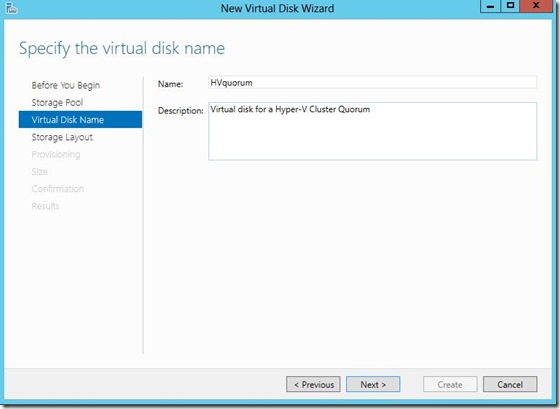
1 This virtual disk will be Simple, Thin and will be 5GB big. This is enough for Quorum disk.
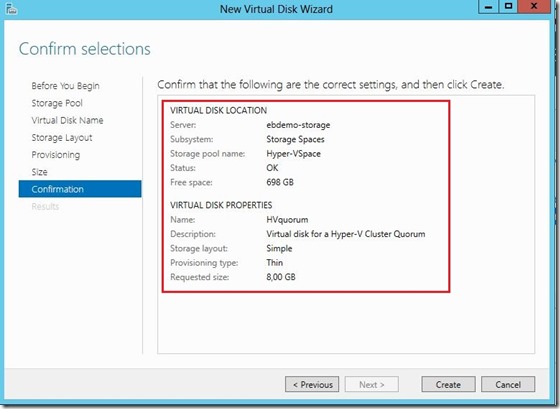
1
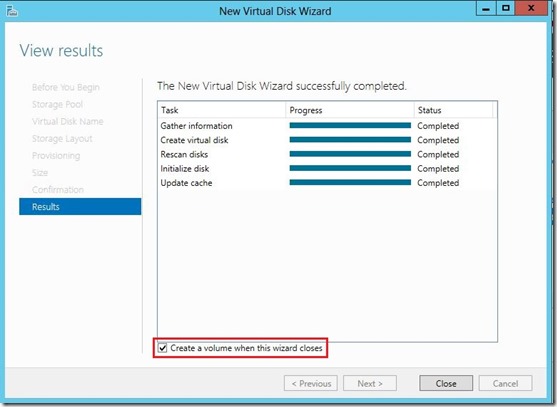
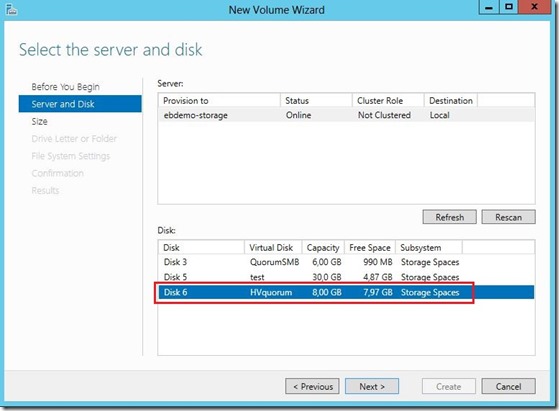
After we are done with virtual disk creation need to create a volume!

1

1

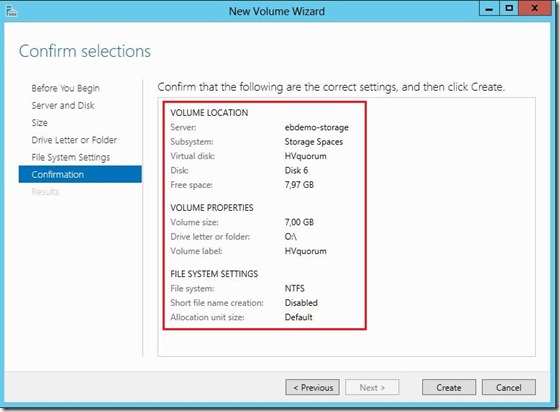
Here is quorum disk configuration.

1

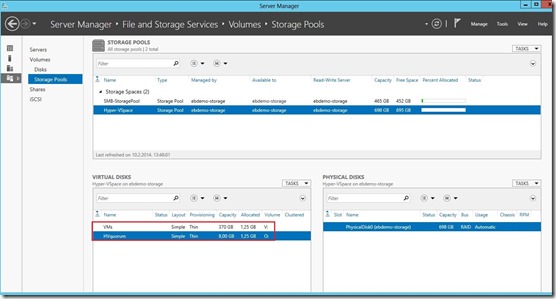
Now I’ll do another virtual disk for a Virtual Machines (Cluster Shared Volume)

1 

iSCSI Virtual Disk

On the storage server now we need to configure iSCSI Target (iSCSI Virtual Disk…) for a Hyper-V hosts on the both previously created disks.
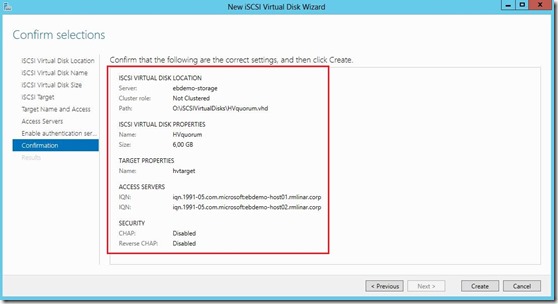
1 2
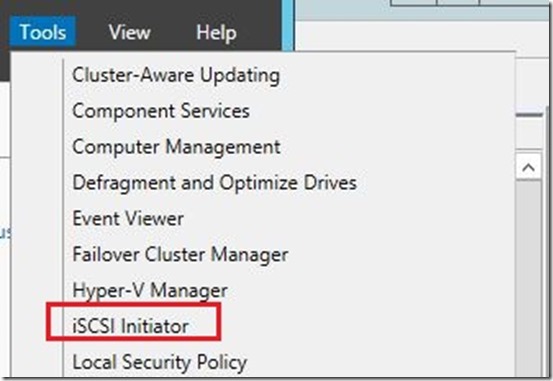
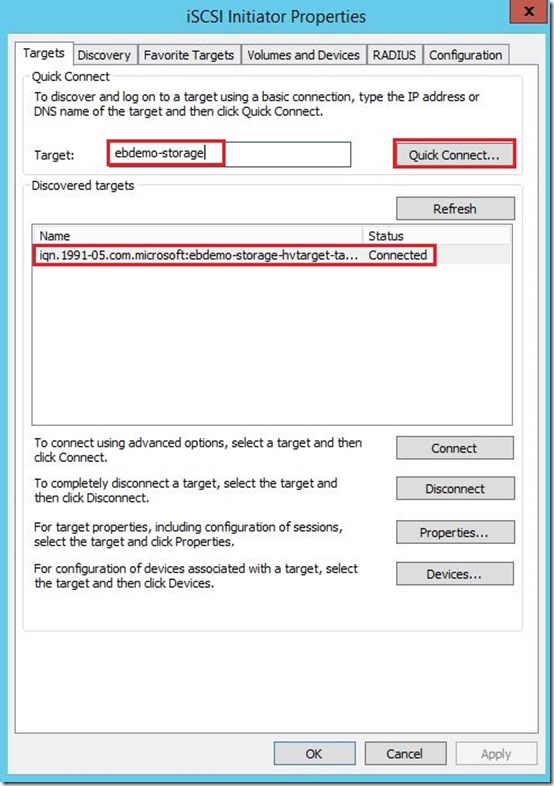
Shift to the Hyper-V hosts and let’s configure iSCSI initiators. On the both (or on the all Hyper-V hosts) Hyper-V hosts under Server Manager console open iSCSI Initiator and connect to the storage server.

1
1

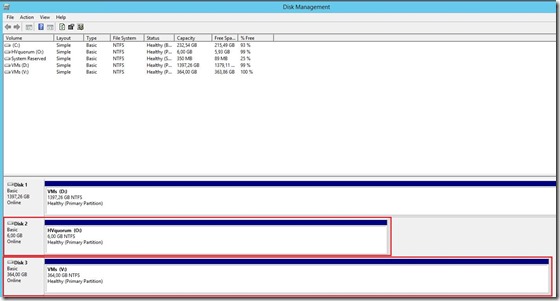
On the Hyper-V host open Disk Management to view disks!
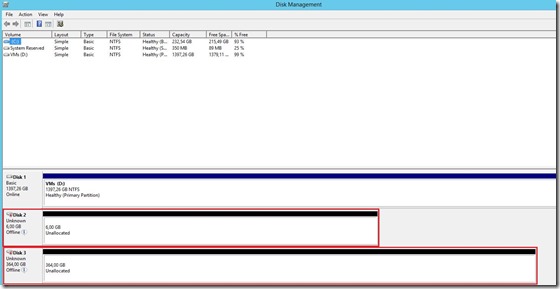
1

The next steps are; Bring disks Online, Initialize Disk and Format Disk

1

Now we have everything what we need for a Cluster creation, network, storage and Hyper-V hosts. Let’s create cluster.
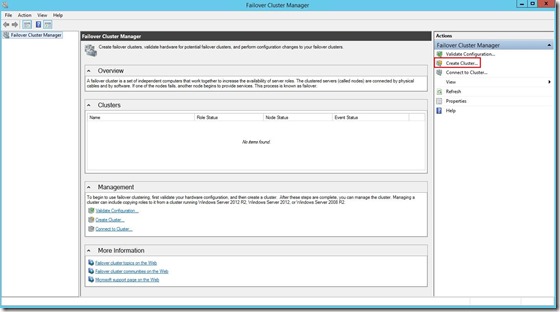
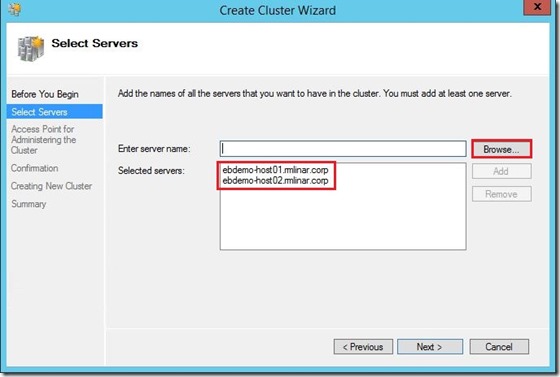
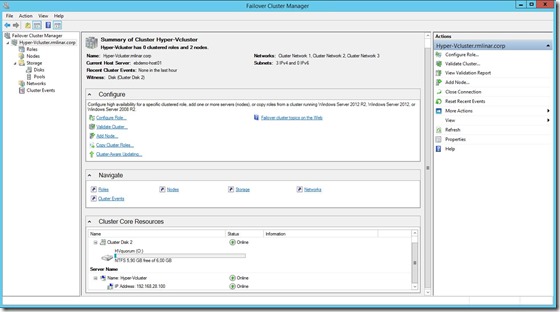
Open Failover Cluster Manager console and click on Create Cluster

1

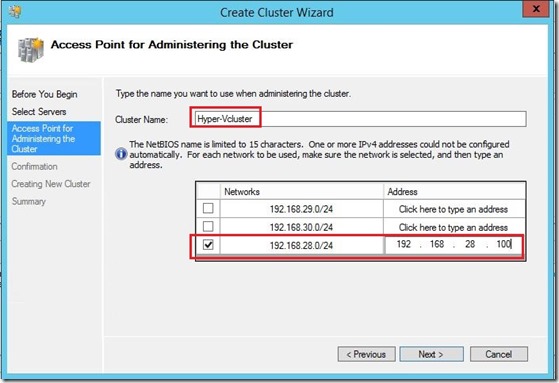
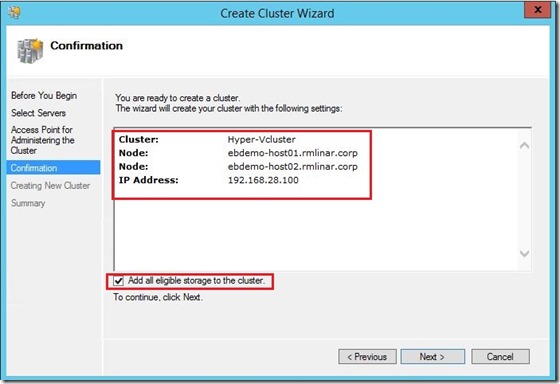
Follow the steps below

1 
1 
1 1

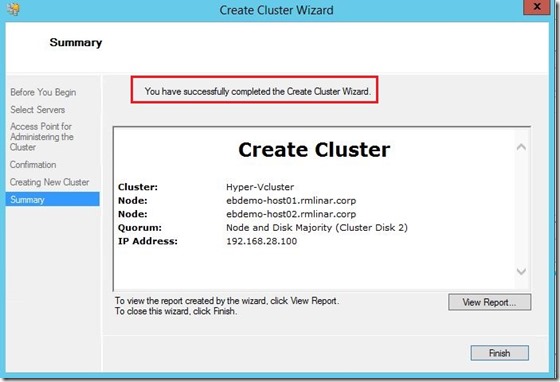
At the end we have our Hyper-V Cluster created ;)

1

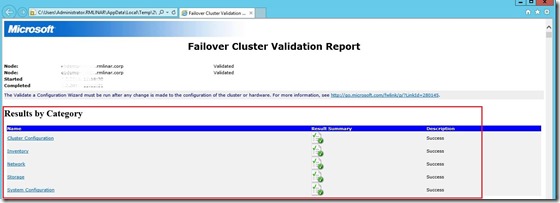
Don’t forget to do Cluster Validation after you are finished. If you have some warnings fix them and go ahead.

SMBclusterValidation

In the next blog post we will se how to configure disks, network, Virtual Machine Role (Configure Role) as well as how to create highly available virtual machines and lots of beautiful things such as Live Migration etc.

Cheers,

Romeo

Remove an iSCSI Target on Windows Server 2012 R2

In this blog post I’d like to explain how to remove old, unusable, inactive iSCSI Targets on Windows Server 2012 R2.
In one of my labs environment I created few iSCSI Targets and I don’t need them any more. So, I want to remove them.

NOTE:When you remove a target, all initiators currently logged on to that target will no longer be able to access the LUNs that are assigned to that target. This action cannot be undone.”

Under Server Manager console expand File and Storage Services – iSCSI. At the bottom you will see iSCSI Targets tab. Click on TASKS (on the right hand side), you will see tab View all Targets.

1

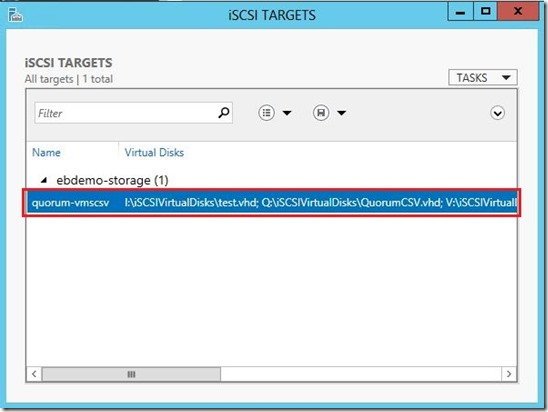
All iSCSI, active and inactive will appear. As you can see in the picture below, I have only one active iSCSI Target and want to delete all inactive iSCSI Targets.

2

Only what need to do is to click on the iSCSI Target and then click Remove Target.

3
6

Now we have only a few iSCSI Targets to remove…
Unfortunately we can’t select all inactive iSCSI Targets and remove them in one click, we need to remove one by one.

At the end we have only active iSCSI Target as we should to have.

7

Enjoy the day and have a nice weekend!

Romeo

Hyper-V did not find virtual machines to import from location “*”… migration from 2K8R2 to WS2012R2

As I said a few times so far, I have been writing blog posts to be my reminder and help to other blog readers :). Two days ago I migrate one of virtual machines from Windows Server 2008 R2 Hyper-V host to Windows Server 2012 R2 Hyper-V host. As many times until now I did Export then copy to the new storage and then Import, but… I forgot that I already did that a few months ago and what first need to do :). I got error like in the picture below ;)

1

This isn’t something new. I rewrite Rhoderick’s and Taylor’s articles. Thank you guys.

VM’s that are exported from Windows Server 2008 or 2008 R2 utilized the version 1 WMI namespace which resulted in a .exp file to represent the exported virtual machine. In Windows Server 2012 we introduced a new WMI namespace (version 2 or root\virtualization\v2) which implemented a much better import/export model – allowing you to effectively just copy the virtual machine folder (with the VM’s XML configuration file inside it) as well as the VM’s VHDs and then import that directly. For Windows Server 2012 we maintained the version 1 WMI namespace which allowed for importing of Windows Server 2008/R2 VM’s on 2012.

In Windows Server 2012 R2 we have removed the old version 1 namespace which means we can’t import virtual machines that where exported from Windows Server 2008/R2. However we can import them if you copy the virtual machine xml file and VHD’s – to do this you need to stop the vmms on the 2008/R2 server – copy all of the virtual machine files/vhds to the Windows Server 2012 R2 server and then import them.

What to do? We have two solutions!

The first is as follows:

Shut down all Hyper-V virtual machines on the WS2008R2 host then stop the Hyper-V Virtual Machine Management service.

1

net stop "Hyper-V Virtual Machine Management"

1

Copy all virtual machines what you want to migrate to WS2012R2 Hyper-V host then Import Virtual Machine… That’s easy way, but…

1

What if we already did Export and we don’t have WS2008R2 Hyper-V host?

The second resolution is as follows:

Exported Hyper-V virtual machines copy on the Windows Server 2012 and import them, then simple copy to a Windows Server 2012 R2. That server is only used to perform the import thus allowing the VM to be copied to Windows Server 2012 R2.

Now we can do whatever we want to do :)

I worked over the holidays and from tomorrow I’m going to deserved break until the end of the week.

Enjoy the day!

Romeo