I believe in Hyper-V!

Windows ServerCategory Archives

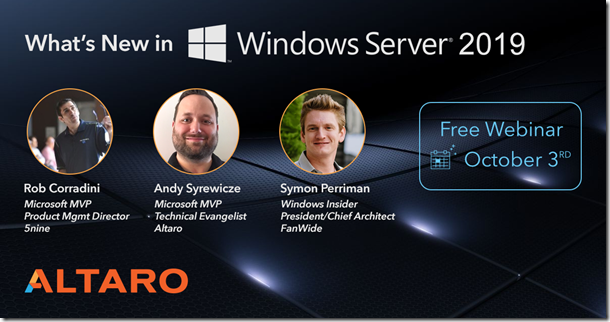
Windows Server 2019 Webinar

Altaro-Webinar-Windows-Server-2019-1200x630-no-cta

Hi to all,

I’m glad to share with you information about Windows Server 2019 webinar which will be on October 3th provided from Altaro software. Please join us.

With Microsoft Ignite just around the corner, Windows Server 2019 is set to get its full
release and the signs look good. Very good.
Unless you’re part of the Windows Server insider program – which grants you access to the
latest Windows Server Preview builds – you probably haven’t had a hands-on experience yet with Windows Server 2019 but the guys over at Altaro have and are preparing to host a webinar on the 3rd of October to tell you all about it.
The webinar will be held a week after Microsoft Ignite so it will cover the complete feature
set included in the full release as well as a more in-depth look at the most important
features in Windows Server 2019.

Whenever a new version of Windows Server gets released there’s always a lot of attention
and media coverage so it’s nice to have an hour-long session where you can sit back and let a panel of Microsoft experts cut through the noise and give you all the information you
need.
It’s also a great chance to ask your questions direct to those with the inside knowledge and receive answers live on air.
Over 2000 people have now registered for this webinar and I’m going to be joining too. It’s
free to register – what are you waiting for?
Save your seat: https://goo.gl/QixbPz

Enjoy Smile

Romeo

Altaro VM Backup 7.6 released

468x60 hyper-v

Altaro released a new version of its flagship backup product for Hyper-V and VMware. In version 7.6 Altaro introduced several important new features which all users will love.

Continuous Data Protection (CDP) for Local Backups

Continuous Data Protection (CDP) – users can switch from running daily backups to a continuous data protection model yielding an improved Recovery Point Objective (RPO) of up to 5 minutes. This dramatically reduces the Recovery Point Objective (RPO). RPO is the point in time to which VMs are restored by a backup solution in case of a disaster. With CDP in place, users’ RPO is optimized to up to 5 minutes, instead of the hours of data loss faced in cases where users are simply running daily backups.

Note- CDP is currently available for Hyper-V, VMware support will be released soon.

Grandfather-Father-Son Archiving (GFS) for Local Backups

Altaro VM Backup 7.6 introduces GFS, enabling users to choose to archive the backup versions over and above their continuous and daily backups instead of deleting them (local backups only).

With GFS Archiving enabled, Altaro VM Backup also keeps the following backups, with the time periods are shown all starting from the time of the last successful backup:

  • 1 backup per week for 12 weeks
  • 1 backup per month for 12 months
  • 1 backup per year for 2 years

Change Block Tracking Updates for 2012/2012R2

CBT refers to Change Block Tracking and allows users to take fast incremental backups without having to scan the entire virtual machine (VM) for changes each time. This can reduce backup duration down from hours to minutes. When CBT is not available, a lengthy full scan for changes is required.

This release addresses an issue in Altaro VM Backup 7 CBT for Windows Server 2012 and 2012 R2 where CBT is disabled and a full scan for changes is required in the following scenarios:

  • Altaro VM Backup or one of the Hyper-V Host agents is updated
  • Altaro VM Backup services or one of the Hyper-V Host agents is restarted
  • A Hyper-V Host is restarted
  • A Virtual Machine on a Failover Cluster migrates between nodes.

Altaro VM Backup 7.6 addresses this and the above scenarios do not require that a full scan is taken.

Concurrent Retention, Restore, Backup and Offsite Copy operations on the same Virtual Machine

In previous Altaro VM Backup versions only one operation could be performed on a Virtual Machine at the same time. 

· If a retention policy takes quite long to complete then backups and restore operations are queued until retention is complete.

· If an Offsite Copy to Azure takes days to complete, especially for the initial backup; then backups and restore operations for that VM are queued until it is complete.

· If a Restore, File Level Restore or Boot from Backup operation is active then no backups for that Virtual Machine could take place until they are completed.

In Altaro VM Backup 7.6 these limitations have been addressed, allowing users to restore and take Offsite Copies without delaying any Backups whether scheduled or CDP.
In addition to that, now that it can run concurrently, the retention operation runs four times throughout the day in order to keep the backup repository clean.

Summary

From my perspective, Altaro VM Backup is constantly evolving product and more and more features are implemented for easier backup and restore. If you haven’t tested Altaro simply download test version and try it.

Cheers,

Romeo

Convert/Copy the content of pass-through disks to .VHDX file format

Hi there,

In this blog post I’d like to show you how to convert, copy the content of past-through disk to virtual hard disk, .VHDX.
I’ll not write about differences between those two disk format, will only show you how to simple convert. To be honest, this post is note for me Open-mouthed smile.

So, let’s start, step by step.

  1. Ensure that you shut down the virtual machine that is connected to the pass-through disk.
  2. Make sure you have sufficient hard disk space to store the new VHDX file when it is converted.
  3. Open Hyper-V Manager console.
  4. Select the virtual machine with the pass-through physical hard disk.
  5. In the action pane, click New, and then click Hard Disk.
  6. The New Virtual Hard Disk Wizard appears. Click Next.
  7. Click .VHDX, and then click Next.
  8. Choose which disk type you want, Dynamically expanding or Fixed size, and then click Next. Usually I choose Dynamic virtual disk.
  9. Specify the Name and Location of the new .VHDX file, and then click Next.
  10. Click Copy the contents of the specified physical disk.
  11. Click the name of the appropriate offline physical hard disk from the available physical hard disks, and then click Next.
  12. Click Finish.
  13. At the end, remove pass-trough disk from the virtual machine and add new .VHDX

  14. Start virtual machine and enjoy Winking smile

  15. The contents of the pass-through disk or the direct-attached storage disk will be converted to the .vhdx file format. This might take some time depending on the size.
    For example: For 1.2TB pass-trough disk I needed almost seven hours on the SAS 15K disk drives.

    NOTE: Keep in mind that your virtual machine will be unavailable during the convert/copy process.

    Source: Technet

    image

    Cheers,

    Romeo