In this blog post I’d like to explain how to create highly available virtual network for Hyper-V virtual machines as well as for Hyper-V hosts and other services related on virtual machines.
Not that log ago practice was; you have to have at least four network adapters on Hyper-V host. One for the management, one for the live migration, one for a backup, virtual machines etc. But! What if network adapter for management or for virtual machines corrupt? We don’t have access to hosts or virtual machines!
To avoid this we will be create highly available virtual network. I have one Hyper-V host with three physical network adapter! I’ll first rename physical adapters then I’ll create NIC Team, Virtual Switch and Virtual Network Adapters.
1. Rename physical NICs

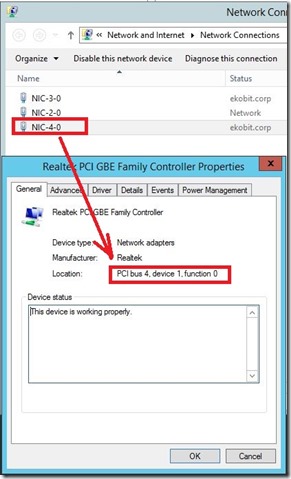
Why we need to rename NICs? If one or more network adapters spoil you don’t know which one is broken. On this way we will exactly know which one and in which PCI bus port is spoiled. Look picture below.
Here is PowerShell script!
Function Resolve-PCIBusInfo {

param (
[parameter(ValueFromPipeline=$true,Mandatory=$true)]
[string]
$locationInfo
)
PROCESS {
[void]($locationInfo -match  "\d,\d,\d")
$busId,$deviceID,$functionID = $matches[0] -split ","

new-object psobject -property @{
          "BusID" = $busID;
          "DeviceID" = "$deviceID"
          "FunctionID" = "$functionID"
          }
}
}


Function Rename-NicBusFunction {
$Adapters = get-wmiobject win32_networkadapter -filter "netenabled=true"  | where {$_.PNPDeviceID -notlike "ROOT\*"}
foreach ($Adapter in $Adapters ) {
    $AdapterName = Get-WMIObject Win32_NetworkAdapter | where { $_.PNPDeviceID -eq $Adapter.PNPDeviceID }
    $OldName = $AdapterName.NetConnectionID
    write-host "Network Adapter name before:" $OldName

        $DeviceID = $Adapter.PnPDeviceID
        $locationInfo = (get-itemproperty -path "HKLM:\SYSTEM\CurrentControlSet\Enum\$DeviceID" -name locationinformation).locationINformation

        if ($locationInfo -match  "\d,\d,\d") {
            $BusInfo = Resolve-PCIBusInfo -locationInfo $locationinfo

        $Bus = $BusInfo.BusID
        $Funct = $BusInfo.FunctionID
        $NewName = "NIC-$Bus-$Funct"

        $AdapterName.NetConnectionID = "$newName"
        $rename = $AdapterName.Put()
        write-host "Network Adapter name after : $NewName"
        }
        else {
        $NewName = write-host "Network name not changed. Old name: $OldName"
        }
    Write-Host
}
}

Rename-NicBusFunction
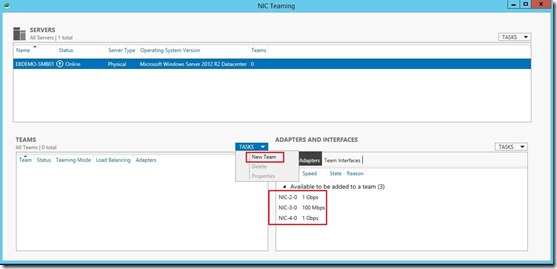
The next step is to create NIC Team. We can do that on two ways, with GUI or with PowerShell. I prefer PowerShell
New-NetLbfoTeam -Name SMBTeam -TeamMembers NIC-2-0,NIC-3-0,NIC-4-0 -LoadBalancingAlgorithm Dynamic -TeamingMode SwitchIndependent
Now we have NIC Team called SMBTeam, Switch Independent, Dynamic crated from three physical network adapters.
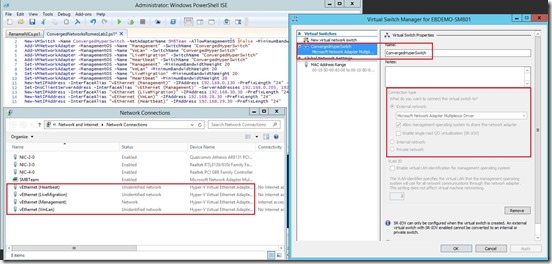
In the next step we will create virtual switch. This kind of virtual switch we can create only with PowerShell. As you can notice I don’t have any virtual network switch created in Hyper-V.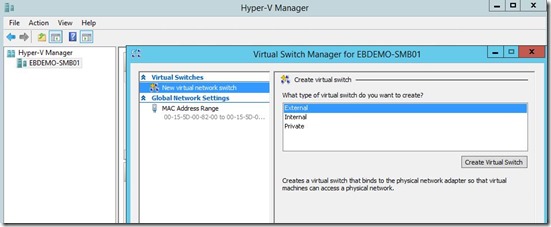
So, let’s create one Converged Virtual Switch and four Virtual Network adapters.
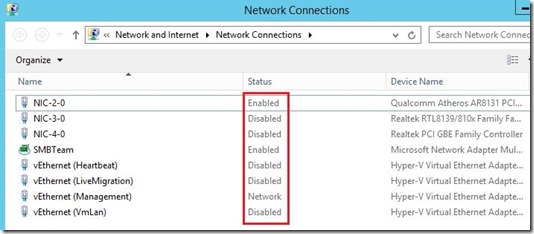
This server will be Hyper-V Cluster node and I created four virtual network adapters. Heartbeat, LiveMigration, VmLan and one for Management. Now I have highly available virtual network. As you can see in the picture below, if I disable three of four virtual adapters or two of three physical adapter still can connect to Hyper-V host ;).
Cool, isn’t it ;)
Here you can find PowerShell script for Converged network.
New-NetLbfoTeam -Name SMBTeam -TeamMembers NIC-2-0,NIC-3-0,NIC-4-0 -LoadBalancingAlgorithm Dynamic -TeamingMode SwitchIndependent
New-VMSwitch -Name ConvergedHyperSwitch -NetAdapterName SMBTeam -AllowManagementOS $False -MinimumBandwidthMode Weight
Add-VMNetworkAdapter -ManagementOS -Name "Management" -SwitchName "ConvergedHyperSwitch"
Add-VMNetworkAdapter -ManagementOS -Name "VmLan" -SwitchName "ConvergedHyperSwitch"
Add-VMNetworkAdapter -ManagementOS -Name "LiveMigration" -SwitchName "ConvergedHyperSwitch"
Add-VMNetworkAdapter -ManagementOS -Name "Heartbeat" -SwitchName "ConvergedHyperSwitch"
Set-VMNetworkAdapter -ManagementOS -Name "Management" -MinimumBandwidthWeight 20
Set-VMNetworkAdapter -ManagementOS -Name "VmLan" -MinimumBandwidthWeight 20
Set-VMNetworkAdapter -ManagementOS -Name "LiveMigration" -MinimumBandwidthWeight 20
Set-VMNetworkAdapter -ManagementOS -Name "Heartbeat" -MinimumBandwidthWeight 20
New-NetIPAddress -InterfaceAlias "vEthernet (Management)" -IPAddress 192.168.0.130 -PrefixLength "24" -DefaultGateway 192.168.0.224
Set-DnsClientServerAddress -InterfaceAlias "vEthernet (Management)" -ServerAddresses 192.168.0.203, 192.168.0.202
New-NetIPAddress -InterfaceAlias "vEthernet (LiveMigration)" -IPAddress 192.168.30.30 -PrefixLength "24"
New-NetIPAddress -InterfaceAlias "vEthernet (VmLan)" -IPAddress 192.168.28.30 -PrefixLength "24"
New-NetIPAddress -InterfaceAlias "vEthernet (Heartbeat)" -IPAddress 192.168.29.30 -PrefixLength "24"
In the next posts I’ll be write about Hyper-V Cluster, SMB Cluster, Storage Spaces and everything related on HA Hyper-V virtual machines.
P.S. Big thanks to my buddies Luka Manojlovič and Tomica Kaniški who helped me.
Stay tuned and be virtualized :)
Also, tomorrow is Christmas and I wish you all the best. Get rest and see you in 2014.
Cheers,
Romeo
