I believe in Hyper-V!

SCVMMCategory Archives

Adding Hyper-V host to VMM 2012 RC that is in Perimeter network (DMZ)

In this post I would like to describe how to add Hyper-V host to Virtual Machine Manager 2012 RC when host isn’t in a trusted domain. In this scenario I ‘ll add Hyper-V host which is in Perimeter network.

To do that you must meet all requirements.

Step 1.

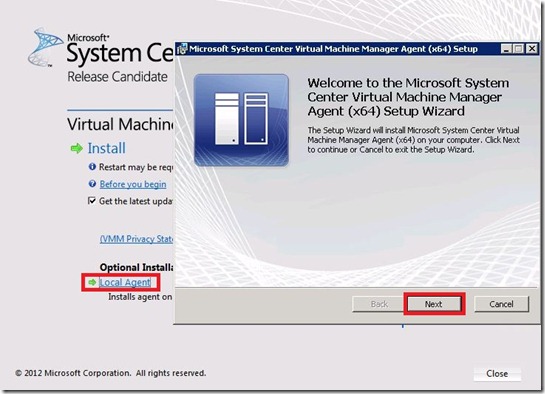
First you need to install VMM Local Agent on Hyper-V host just like in the picture below.

agent

agent1

Step 2.

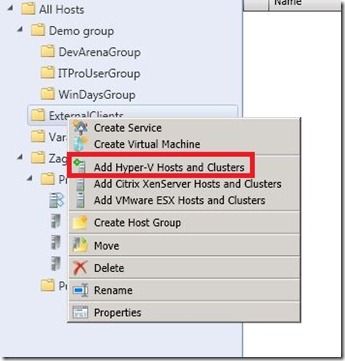
Go to your VMM 2012 RC Server, open Console –> VMs and Services –> right click on selected container –> Add Hyper-V Hosts and Clusters and follow procedure.

agent3

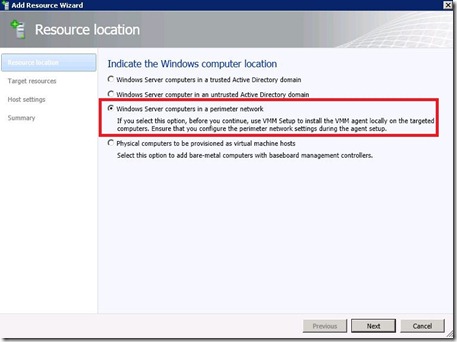
Because your Hyper-V host is in the Perimeter network you need to mark that option.

agent4

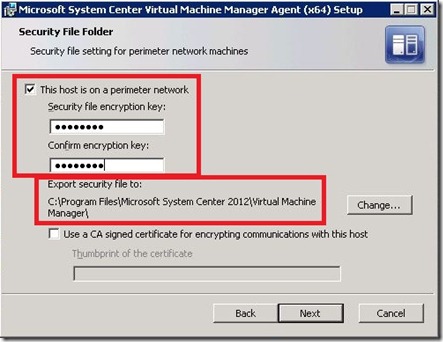
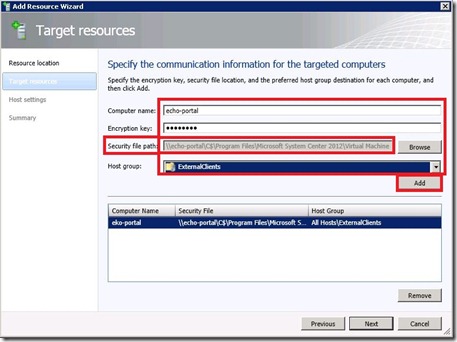
Fill in all fields. Pay attention to Security file path.

agent5

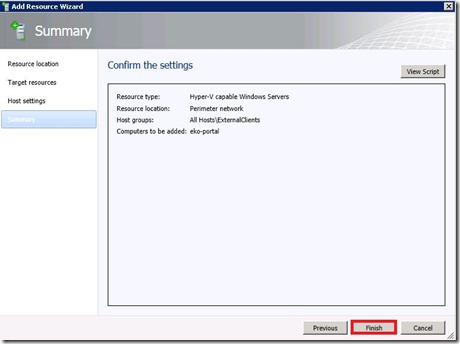
We are done with the wizard.

agent6

agent7

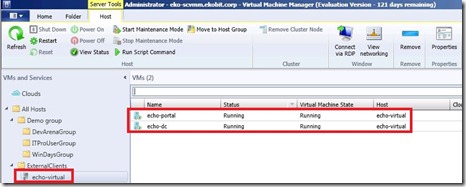
Our Hyper-V host with guests appeared in the VMM Console.

agent8

Step 3.

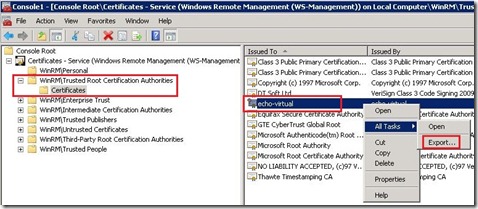
The most important thing if you want to connect via Console or via RDP to VM’s through VMM Console is to export Hyper-V server certificate and import to VMM server. How to do that? Follow instructions below.

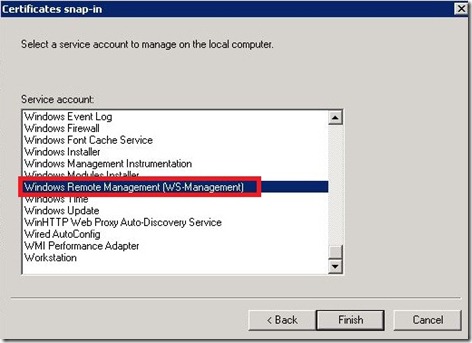
On Hyper-V server open MMC and Add/Remove Snap-in, add Certificates –> Service Account –> Local Computer. Expand WinRM\Trusted Root Certification Authorities –> Certificates. Export certificate and import to your VMM server.

agent9

agent10

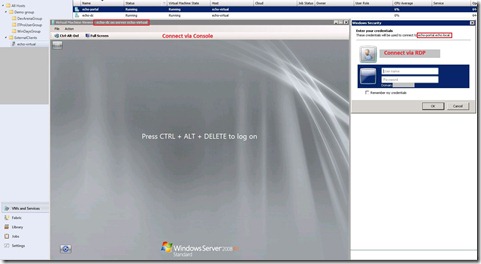
After you import certificate on VMM server you will be able to connect via Console or via RDP.

agent11

Done!

Migrate Virtual Machine from one Hyper-V host to another using Virtual Machine Manager

Today I had to migrate a Virtual Machine from the host on which there is no place to another Hyper-V host and I would like to share with you how it works.

First of all I would like to explain what types of migration have Virtual Machine Manager.

– Quick migration (cluster migration)
– SAN migration
– Live migration and VMware VMotion
– Network migration – This type of migration will be explained in this post.

As always it will be lots of pictures Smile

I this scenario, I’ll migrate virtual machine named vm-appv01 from the host eko-virtual03 to the host eko-virtual05.

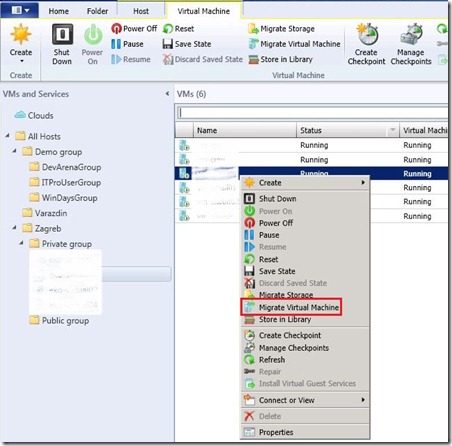
Open your VMM Console and choose which VM would you want to migrate. Click Migrate Virtual Machine and the process will start.

1

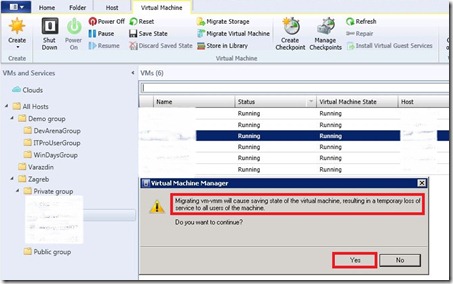
This is a network migration and we will get this message.

2

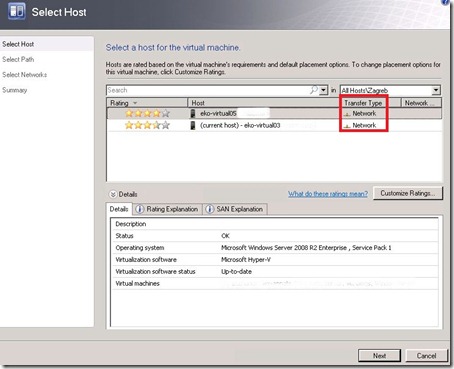
Select host on which you want to migrate a virtual machine. In my case it’s eko-virtula05.

3

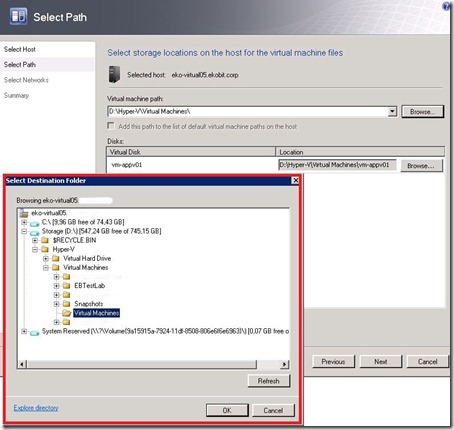
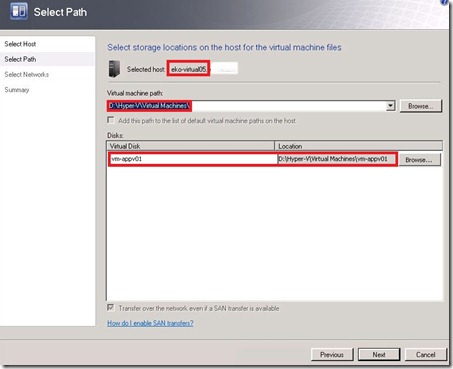
On the next window choose path for the virtual machine and virtual disk or even better do it when configuring the Virtual Machine Manager.

5

4

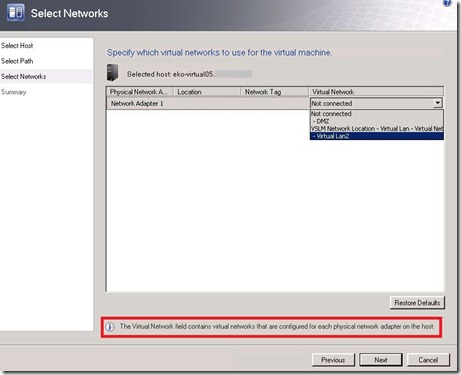
Select the available LAN adapter on the new host.

6

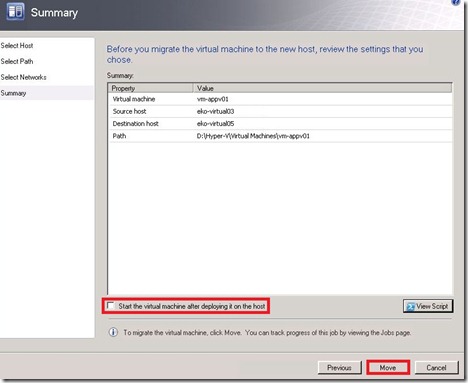
At the end of the wizard click Move. If you want to turn on the server after migration to click on
Start the virtual machine after deploying it on the host.

7

Migration process begins.

8


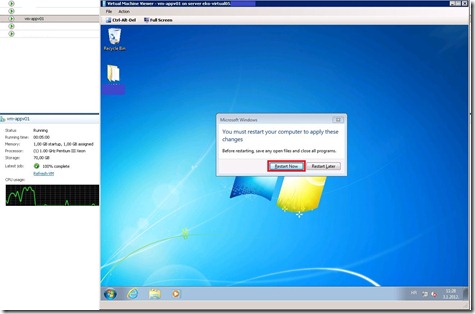
After migration is complete and the virtual machine is turned on you need to do one restart because of the new hardware configuration.

9

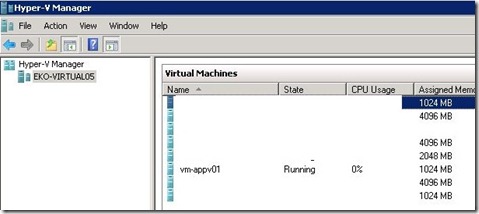
As you can see through Hyper-V manager or Virtual Machine Manager, whatever, your migrated virtual machine is up and running on a new host.

10

That’s all for today.

Configure Self Service Portal with HTTPS!

In this post i would like to explain how to configure Virtual Machine Manager Self Service Portal to use HTTPS.

If your users need to use many virtual machines or if they need to manage, maintain than the best solution is to use Self Service Portal. Self Service Portal is a part of Virtual Machine Manager product. The Self Service Portal is an extensible web-based application that provides virtual machine self-service provisioning functions to groups within an organization. The SSP installation is very simple but when you need more secure access to your SSP you need to use HTTPS, specially if you use external access.

In this scenario I’ll use Microsoft System Center Virtual Machine Manager 2012 and Microsoft Threat Management Gateway 2010.

Step 1.

You need DNS entry for SSP. Something like myssppotal.domain.com. If you can manage your DNS records do it personally, or if you can’t ask your hosting provider to do it for you.

5

Step 2.

For HTTPS you need certificate. Request certificate from your Certification Authority server. The certificate must have the same name like your DNS entry “mysspportal.domain.com”

6

Step 3.

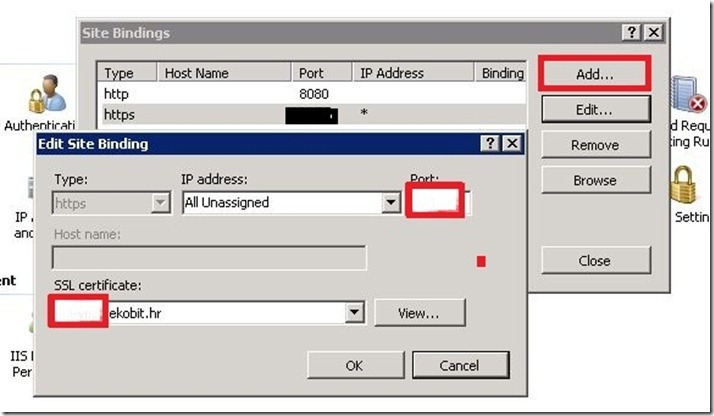
Open your IIS, go to Microsoft System Center Virtual Machine Manager Self-Service Portal (x64) site open Bindings and Add https, assing certificate and chose ssl port. Default port is 443, but you can to use some other port.

7


Step 4.

Open your TMG Management Console, create new Web Listener, assign a issued certificate and create new Firewall Policy rule for your Self-Service Portal.

8

9


Step 5.

When you are done open you SSP from outside.

ssp_link
1
10

Now you have https access to your Self-Service Portal site and you can create, manage and do it what you want with your virtual machines.

That’s it!