I believe in Hyper-V!

Windows 7Category Archives

Convert VMWare image to Hyper-V and stay there forever ;)

Everyone knows that we can convert VMWare virtual machines to Hyper-V with the System Center Virtual Machine Manager 2012 or 2008 R2 through the virtual-to-virtual (V2V) machine conversion process. How to do that you can read here.

But, what to do if we don’t have VMM?
For example; I need convert a few virtual machines from VMWare Workstation (XP, Server 2003 and one Server 2008 R2) to Hyper-V and that VMs I need import on my laptop with Hyper-V role and Windows 8 RP installed.

Here is a small how to:

Step 1.

Uninstall VM tools from your virtual machine. Log into virtual machine, open Control Panel –> Programs and Features and click Uninstall.

Step 2.

Shutdown the virtual machine!
Usually your VMWare VMs are based on SCSI drives, because VMWare recommends SCSI, and the operating systems are Windows XP, Windows Server 2003 or earlier then you have to add then you have to add the IDE driver to your VM before you shut it down in VMWare.
Otherwise you will end up with a converted VM that starts up in Hyper-V with a blue screen of death (BSOD) and 0x0000007B – “Inaccessible Boot Device” error. This is due to the fact that your converted VM will have no Primary IDE Channel and Hyper-V will presume that your converted disk is IDE type and located on the Primary IDE Channel.
Doing a Windows Repair Install can fix the 0x7B Inaccessible Boot Device error – but it’s both time consuming and the result might not be good.

Please note that adding a temporary IDE disk to your VM is not necessary with VMs running Windows 7 or Windows 2008 R2 – they seem to detect the Primary IDE Channel during initial boot phase.

Step 3.

Add a new IDE disk drive to your VM. Make sure that you select “Adapter: IDE 0 Device: 0” under “Virtual Device Node” while creating the new disk (otherwise you might end up with yet another SCSI disk).
3

Step 4.

Boot up your virtual machine with both drives connected and check that it detects your new IDE drive (along with a primary IDE channel and a disk device driver). You should be able to see the new drive as “not initialized” in Disk Management.

Step 5.

Power off your virtual machine and remove the newly created IDE disk from your VM (you can delete it from disk as well). Do not power on your VMware Machine again!

Step 6.

Now convert your VMDK file to VHD format using the Vmdk2Vhd utility that can be downloaded from http://vmtoolkit.com.
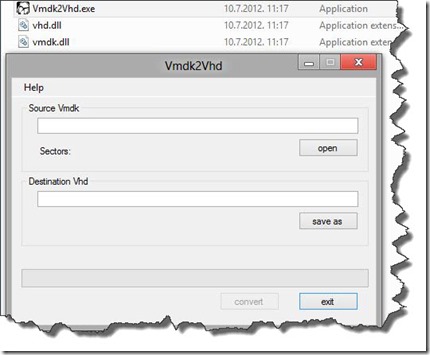
1

Step 7.

Create a new Virtual Machine in Hyper-V. Make sure you select “Use an existing virtual hard disk” and select the VHD file that you just created.

Step 8.

Power it on, and reboot when prompted, also check device manager, and do another reboot.

Step 9.

Check that all your applications and services are running.

NOTE: As I mentioned before, If you have Windows Server 2008 R2 or Windows 7 VMs then it’s not necessary to add a temporary IDE disk during migration…

Enjoy migrating to Hyper-V, the best virtualization technology ever Winking smile.

Prepare Hyper-V virtual machine image for cloning

In one of my previous posts I explained how to Clone a virtual machine with the Virtual Machine Manager, but before Clone our virtual machine we need prepare the virtual machine for cloning.

As you probably know by now, Microsoft-based operating systems use SIDs (Security IDs) that are generated as part of the initial setup of Windows. If you have more than one computer with the same SID, this could cause problems, and cloning a computer (either physical or virtual) without re-generating this SID can cause SID duplication.

Due to the above, we need to prepare virtual machine image for cloning.
This guide assumes that you’ve got some sort of virtualization infrastructure in place. In my case this is a Microsoft Hyper-V. It also assumes that you’ve got some sort of virtualization management tool like System Center Virtual Machine Manager.

In addition, it’s important that you have a basic knowledge about how to set up and run your virtualization product, that you are knowledgeable about setting up virtual machines, and about the proper procedure to install and configure a Windows-based operating system on these virtual machines.

Also, , this guide assumes that you’re knowledgeable about the proper procedures needed to be taken prior to creating a virtual machine clone, how to use SYSPREP (the system preparation tool from Microsoft), and how to create proper answer files for the preparation procedure.

In this post I ‘ll describe how to prepare virtual machine images for Windows Server 2008 R2 and Windows 7.  In Windows Server 2008 R2 and Windows 7 the SYSPREP tool is already included in the operating system, therefore there’s no need to download it like for Windows XP.
To create the proper answer file under Windows Server 2008 R2, Windows 7, you need to either manually edit an existing answer file, or create one for your needs.
To create an answer file for Windows Server 2008 R2 or Windows 7, you must use the tools available in the Windows Automated Installation Kit (AIK) and you can download here.

Preparing the System for Cloning

Prior to cloning the virtual machine there are several steps that you need accomplish. This is not a requirement but is recommended.

  • Log on to the computer as an administrator.
  • Install and customize applications.
  • Customize the Default User profile.
  • Update Windows and other software components.
  • Clean temporary files.
  • Defragment the disk, and compact the VHD file.

Create the UNATTEND.xml Answer File for Windows Server 2008 or Windows 7

Unattended Windows Setup answer file in Windows Server 2008 R2 and Windows 7, is an XML file typically called Unattend.xml. This is the answer file for Windows Setup that is created by using Windows System Image Manager (Windows SIM). The answer file enables the configuration of default Windows settings, as well as the addition of drivers, software updates, and other applications.
The unattended Windows Setup answer file in Windows Server 2008 R2 and Windows 7 needs to be specified during the running of SYSPREP. To do so, run the SYSPREP tool with the /unattend:filename option.

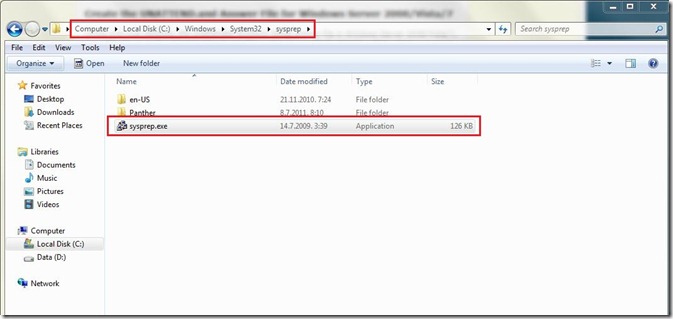
If you wish to manually configure the Windows settings after SYSPREP, run SYSPREP from the C:\Windows\System32\sysprep folder.

1

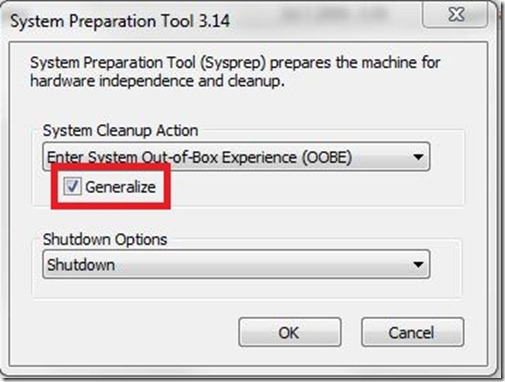
Make sure you do NOT FORGET to select the “Generalize” option if you need to change the computer’s SID. It seems that this version will NOT change the SID unless you pick that option.

2

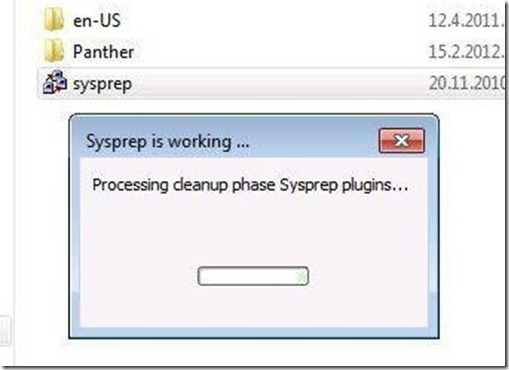
Sysprep is working.

3

When the process is complete the virtual machine will shut down.

OK, our VM is prepared for Cloning and if you want to know how to Clone VM with System Center Virtual Machine Manager read my previous post about that.

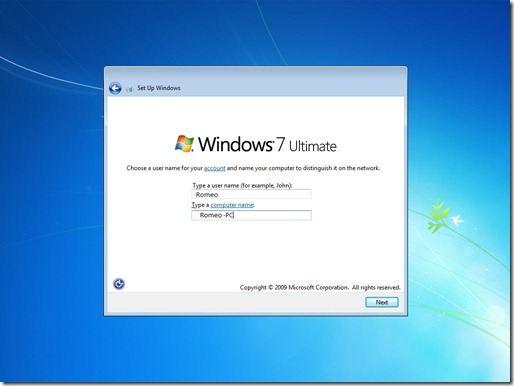
After starting cloned machine, you will be prompted to configure few settings like the user name, computer name, language and some other settings.

4

I need to mention, creating an answer file will greatly ease this process, and the entire process will automatically run.

Folks that’s it!

DaRT 7 – Remote Connection scenario

As I promised in my last post about DaRT 7, today I’ll describe how to use DaRT 7 (Diagnostics and Recovery Toolset) in Remote Connection scenario.

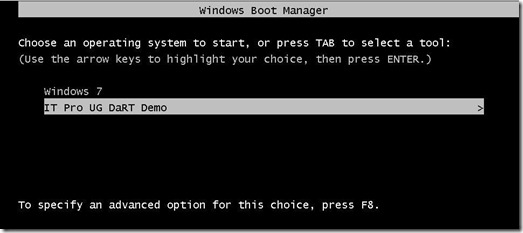
We have created DaRT 7 recovery partition for Windows 7 x64. How to create DaRT 7 recovery partition you can read in my previous post.

1

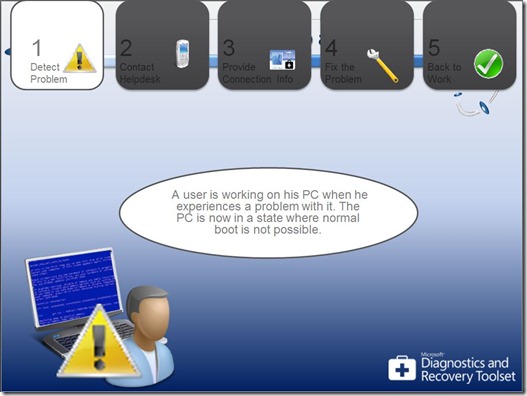
A user is working on his PC when he experiences a problem with it. The PC is now in a state, like BSOD, where normal boot is not possible.

2

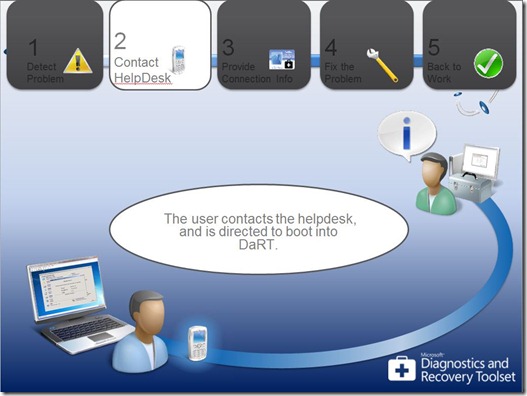
The user contacts the helpdesk over the phone, and is directed to boot into DaRT from the previously created recovery partition.

3

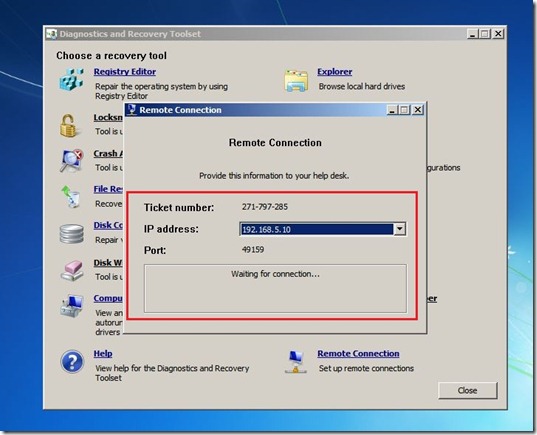
Upon accessing DaRT, the user provides helpdesk staff with connection info from DaRT.

image

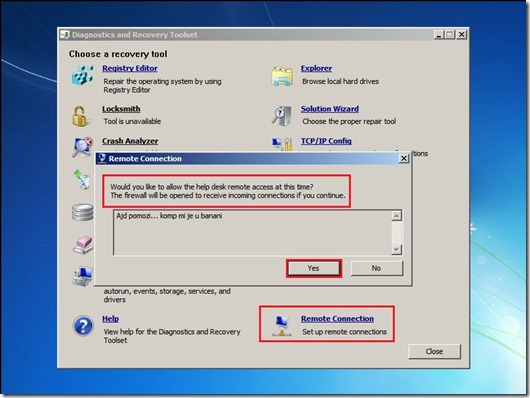
User need to click on Remote Connection and click on Yes.

7

After the user has confirmed that it wants to establish communication with the helpdesk staff parameters appears.

8

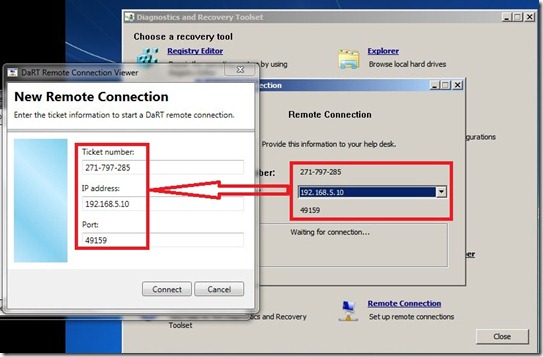
Helpdesk guy opening DaRT Remote Connection Viewer and enters ticket numbers to establish the connection.

9

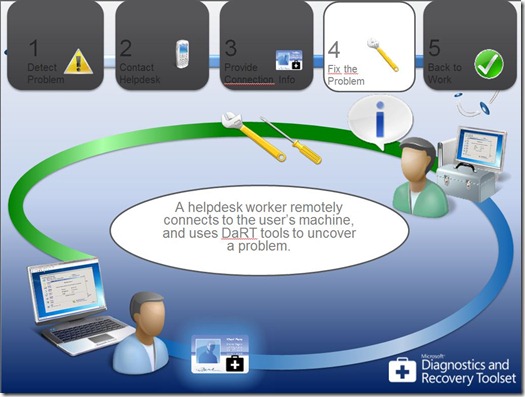
A helpdesk worker remotely connects to the user’s machine, and uses DaRT tools to uncover a problem.

5

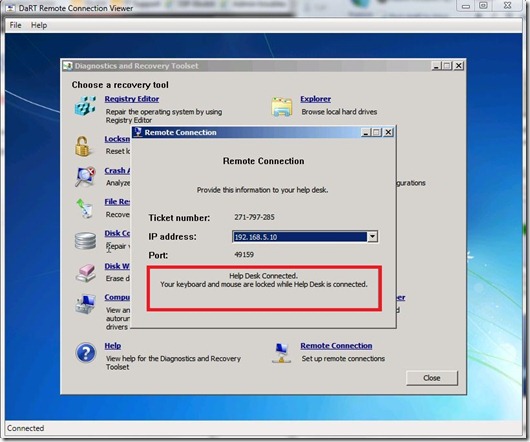
As you can see, Helpdesk guy is connected and also at this moment keyboard and mouse are locked for user.
The helpdesk takes control over the user computer.

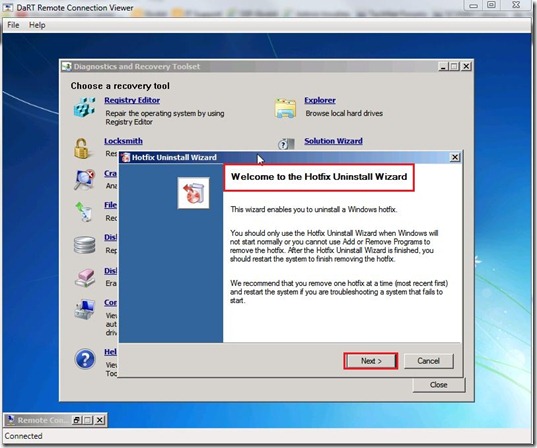
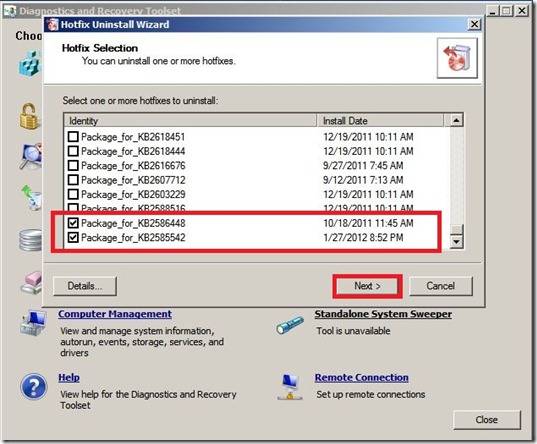
10

It solves the problem, for example, originated caused by some updates, uninstall this updates and bring computer back to life.

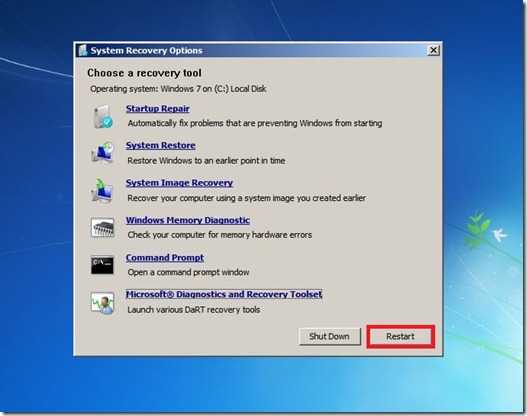
11
12

The helpdesk employee reboots the user’s PC and confirms it is working again. The employee returns to productivity.

13

6

14


I hope this could be helpful for someone.