I believe in Hyper-V!

Windows Server 2012 R2Category Archives

Convert Physical machine to Virtual machine with MVMC 3.0

In this blog post I would like to show you how to convert Physical machine to Virtual machine with MVMC 3.0 which you can download from here. In this version of MVMC we can convert physical machine to virtual machine, other features are more or less the same.

New features in MVMC 3.0

The 3.0 release of MVMC adds the ability to convert a physical computer running Windows Server 2008 or above server operating systems or Windows Vista or above client operating systems to a virtual machine running on Hyper-V host.

Here you can read about standard features in MVMC.

Make sure you have the following pre-requisite on the computer on which you want to run MVMC and they are as follows:
1. Windows Server 2012 R2, Windows Server 2012, or Windows Server 2008 R2 SP1 operating systems.

2. Microsoft .NET Framework 3.5 and .NET Framework 4 if you install MVMC on Windows Server 2008 R2 SP1

3. Microsoft .NET Framework 4.5 if you install MVMC on Windows Server 2012 R2, Windows Server 2012, or Windows 8.

4. Visual C++® Redistributable for Visual Studio® 2012 Update 1

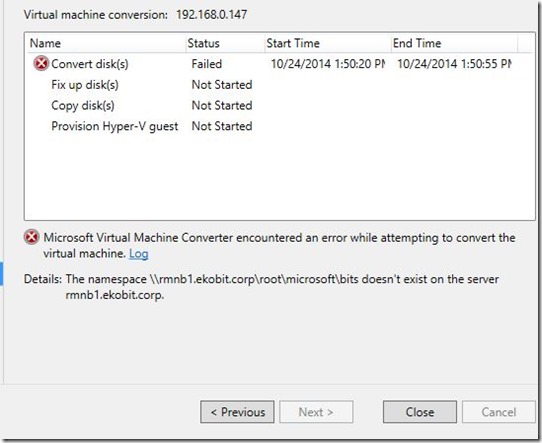
5. Enable the Background Intelligent Transfer Service (BITS) feature in Windows Server.

6. Enable Hyper-V on the destination host

NOTE: If you don’t enable features mentioned above will get this error:
ErrorImportant

From the one side I have Physical machine with Windows Server 2012R2 installed on it, and from the other side I have Hyper-V host.

Here is a pictures guide how to convert ;)
Start MVMC and click Next
1 
On the next screen choose Physical machine conversion
2

Enter the name or IP address and credentials of your physical machine under the Source then go ahead

3

Click on Scan System to see system information
 4 
5
Here we can see Volume Configuration

6

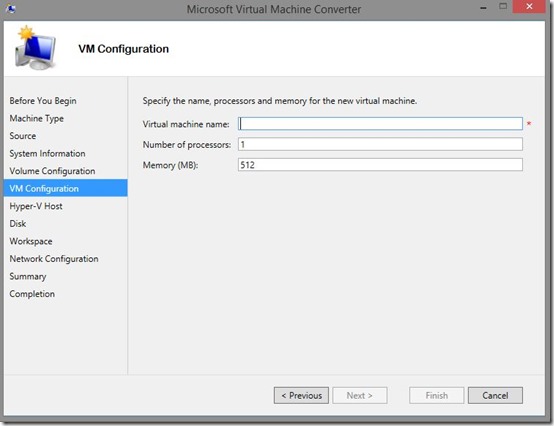
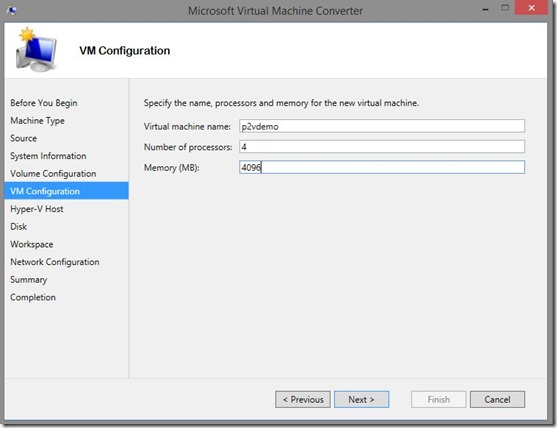
On the next step we need to enter Virtual machine name, number of processors and Memory

7
8

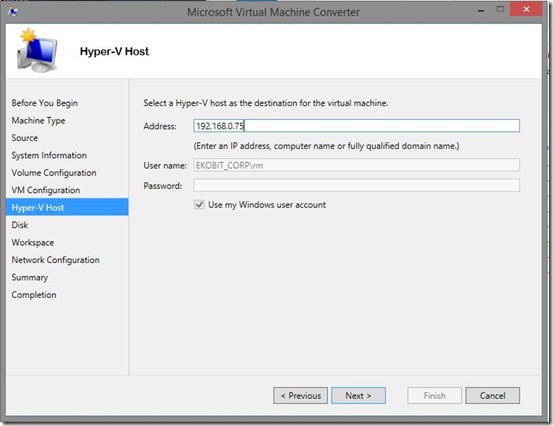
Here we need to fill Hyper-V host information
 9
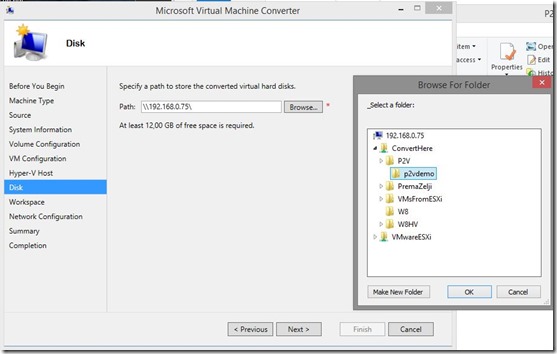
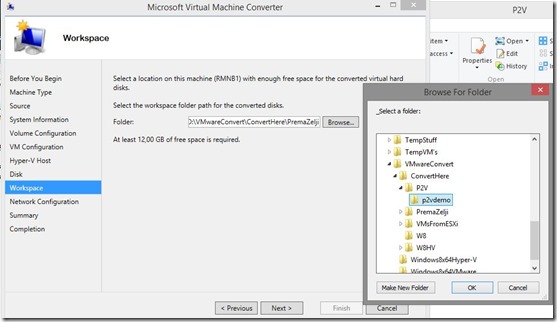
Then we need to choose virtual machine and workspace location
10 
11

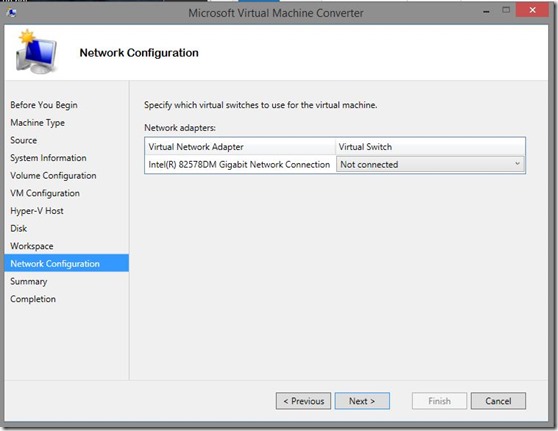
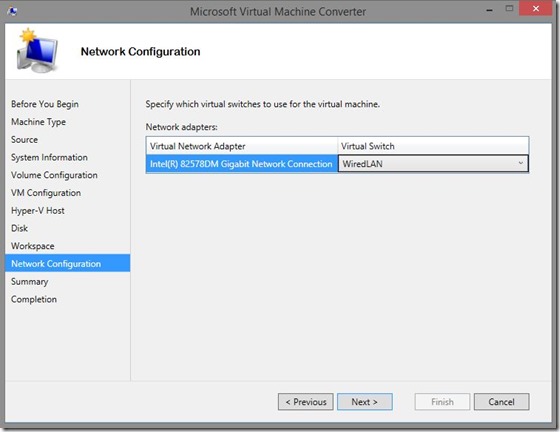
Then, Network Configuration
12 
13

At the end of the wizard we can see Summary and click on Finish to start conversion
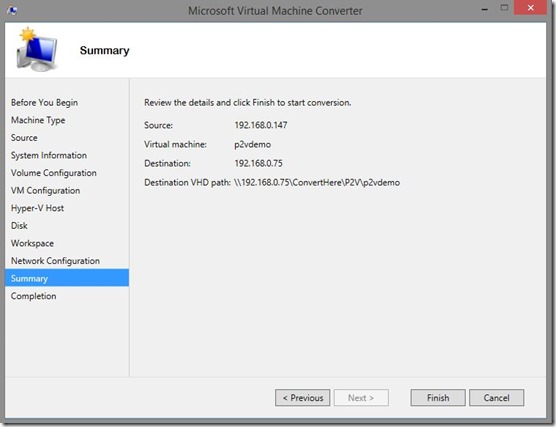
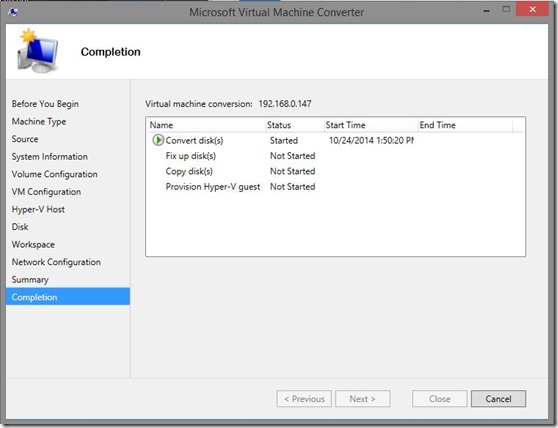
14 
15 
16 

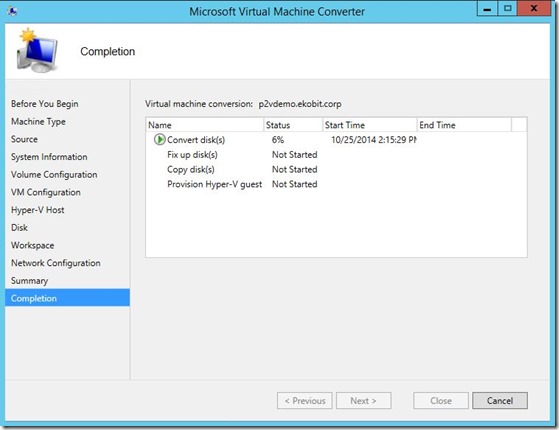
At the end of the conversion process you can see converted machine
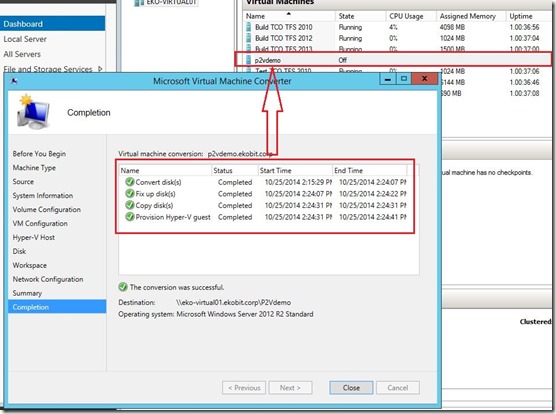
17

Enjoy in virtualization :)

Cheers,

Romeo

Automatic Deployment of TeamCompanion through System Center 2012 R2 Configuration Manager

Last week I received a request from one of our customers about the options for automatic deployment of TeamCompanion to end users. In this blog post I would like to explain and show you how this can be achieved using System Center 2012 R2 Configuration Manager. As always, I’ll lead you through the procedure using lots of pictures :) .

Which prerequisite do we need to start our procedure? An Active Directory, the System Center 2012 R2 Configuration Manager, a couple of domain members, and goodwill.
1

Additionally, your developers need to prepare appropriate packages as follows:

1. SQLSysClrTypes.msi (download from here)
2. ReportViewer.msi (download from here)
3. Ekobit.TeamCompanion.Installer.exe
4. TeamCompanionSetup.exe

The order of the packages is important, so please create exactly in the order stated above.

If you don’t know how to create Applications and Packages here is a guide.
1
1

Do the same for the ReportViewer.msi, Distribute Content and Deploy applications.
Now we need to create three TeamCompanion packages with this order:
TeamCompanionInstaller.exe
– TeamCompanionSetup /S /C
(where /S mean silent and /C is for a user)
– TeamCompanion /S
1 
1
1
1 

Do the same for the rest of packages, Distribute Content and Deploy applications.

After you have prepared all this, you are ready to implement your automatic deployment of TeamCompanion

Step 1.

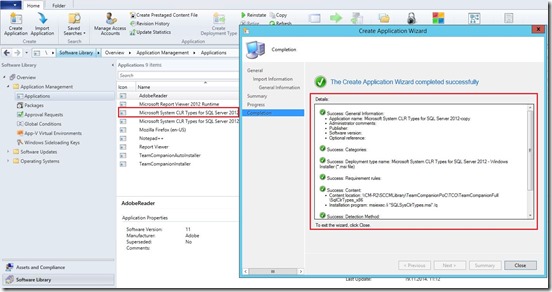
Open the System Center 2012 R2 Configuration Manager console and go to Software Library|Applications and create two applications (Microsoft System CLR Types for SQL Server 2012 & Report Viewer) like in the picture.
2

After you have created Applications, you need to Distribute Content and you need to Deploy applications to the selected clients in the environment.
4

Step 2.

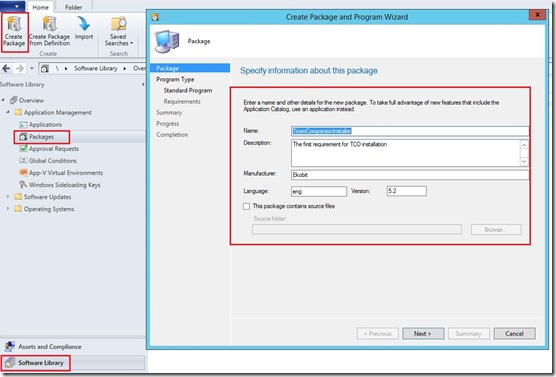
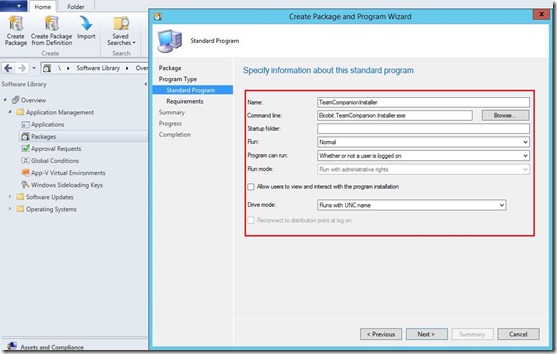
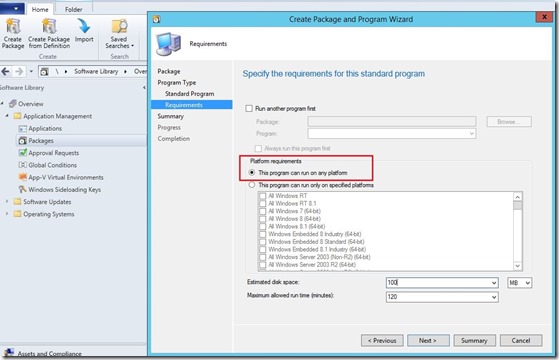
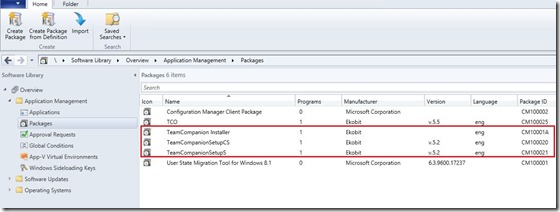
Create three packages (TeamCompanionInstaller.exe, TeamCompanionSetup /S /C and TeamCompanion /S).

3

You are finished on the System Center 2012 R2 Configuration Manager side. Let’s look the client side now!
On the client side, Outlook 2013 and Team Explorer 2013 must be installed to be able to push complete package installation of TeamCompanion.

5

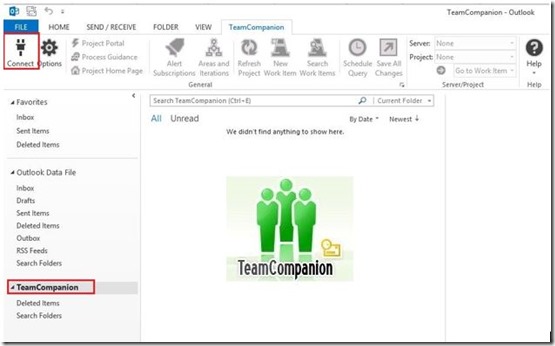
Finally, open Outlook to access TeamCompanion features, connect to your Team Foundation Server and enjoy ;)

TCO1

For more information about TeamCompanion please visit our web page www.teamcompanion.com

Enjoy the day ;)

Cheers,

Romeo

Live Migration fails with hardware error

Today I migrated few of virtual machines from one Hyper-V host (Windows Server 2012) to another Hyper-V host (Windows Server 2012 R2) through Hyper-V Manager console and got “The virtual machine cannot be moved to the destination computer. The hardware on the destination computer is not compatible with the hardware requirements of this virtual machine.”
I checked Processor compatibility as well is it Live Migration enabled, but still nothing.
 9

1 2 3 4 5 6 7 8

So, where the problem is? Mainly, problem is in a virtual network adapter name!
Honestly, message is a little vague.

What we can do in this case?
1. Rename one of the virtual switches to have a matching set between the source and destination Hyper-V hosts, but… what if have situation like this (This is my scenario)
On the first Hyper-V host (WS2012) I have vSwitches configured like in the picture below
15

On the second Hyper-V host (WS2012 R2) I’ve NIC Team with Converged network configured. See picture.
image

In this case isn’t that easy to rename vSwitches or to configure NIC Team on the first Hyper-V host and then to create Converged network etc.

What I did? Very simple, removed network adapter from the virtual machine then I did “Live Migration” from the first host to the second and then attached network adapter from the second host to the virtual machine.
13
Keep in mind that you will have downtime during migration because don’t have network connectivity on the VM.

14 
17

Enjoy the day. See you soon :)

Romeo