Today I had to transfer FSMO roles from one domain controller to another. In this post I want to explain how to do. First of all I want to explain what is FSMO (Flexible Single Master Operation).
We have a five FSMO roles;
1. Schema – Forest-wide and one per forest.
2. Domain Naming – Forest-wide and one per forest.
3. RID – Domain-specific and one for each domain.
4. PDC Emulator – Domain-specific and one for each domain.
5. Infrastructure – Domain-specific and one for each domain.
If you want to transfer the FSMO role must be a member of the following group:
In most cases we keep the FSMO role holders in the same DC (domain controller) as has been configured by Active Directory installation process.
The transfer of an FSMO role is the suggested form of moving a FSMO role between DCs and can be initiated by the administrator for some reason or by demoting DC. The transfer process is not initiated automatically by the operating system.
FSMO role transfer initiated by the administrator is very simple, but when you have demoted DC then you have a problem.
The process of moving the FSMO role from non-operational role holder to a different DC is called Seizing, and is described in the Seize FSMO roles to a domain controller article.
You can transfer FSMO roles via ntdsutil.exe command-line or by using the GUI. If you prefer the GUI, you can use the following three MMC snap-in tools:
– Active Directory Schema snap-in (Schema master)
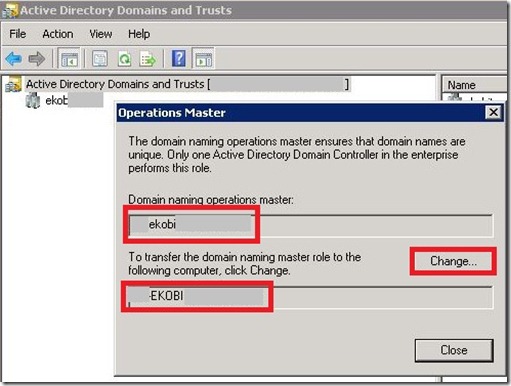
– Active Directory Domains and Trusts snap-in (Domain Naming)
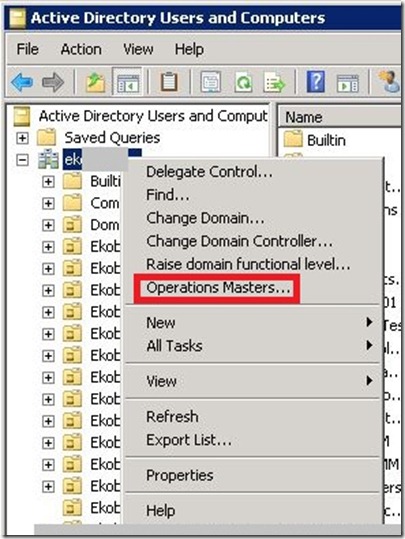
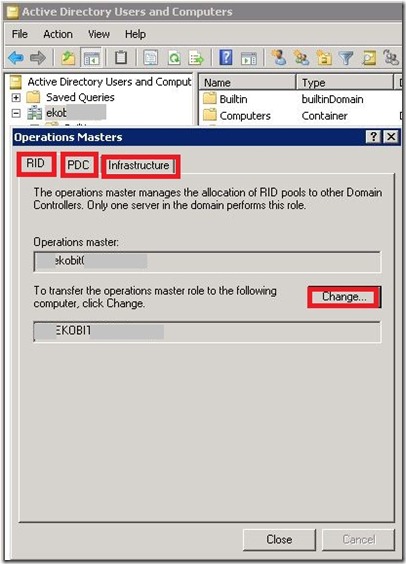
– Active Directory Users and Computers snap-in (RID, PDC, Infrastructure)
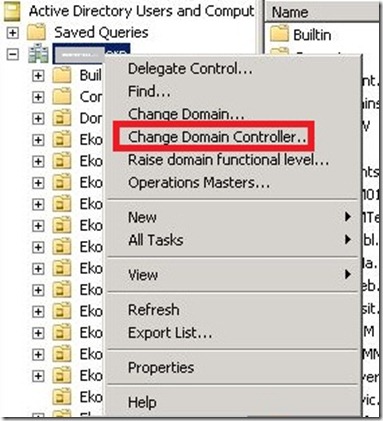
NOTE: You must be logged on the target domain controller. If you are NOT logged onto the target domain controller, in the snap-in, right-click the icon next to Active Directory Schema, Active Directory Domains and Trusts and Active Directory Users and Computers and press Connect to Domain Controller. Select the domain controller that will be the new role holder and press OK.
Transferring the Schema Master via GUI.
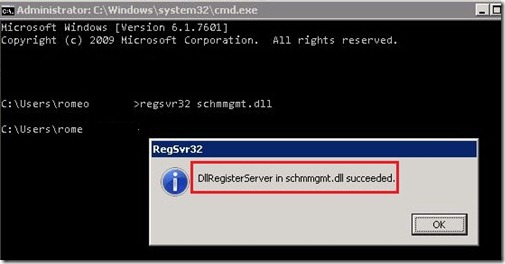
1. Register the schmmgmt.dll library by pressing Start>Run and typing; regsvr32 schmmgmt.dll and Enter.
2. From the Run command open an MMC Console by typing MMC.
3. On the console menu, press Add/Remove snap-in and select Active Directory Schema.
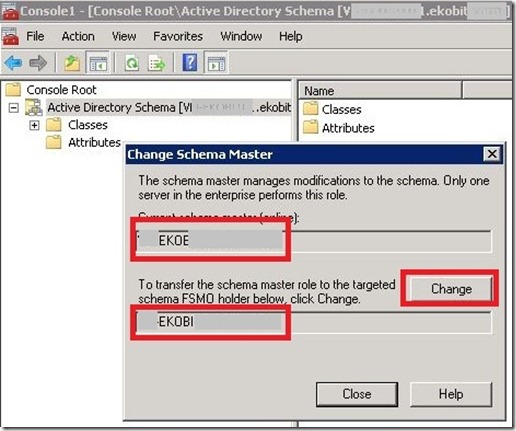
4. Right-click the Active Directory Schema and press Operations Master.
5. Press the Change button and then press OK.
Transferring the Domain Naming master via GUI.
1. Open the Active Directory Domains and Trusts snap-in from the Administrative Tools folder.
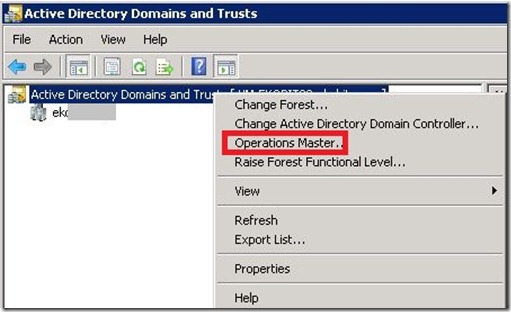
2. Right-click the Active Directory Domains and Trust icon and press Operations Master, press the Change button.
3. Press OK all the way out.
Transferring the RID Master, PDC Emulator and Infrastructure Master via GUI.
1. Open the Active Directory Users and Computers snap-in from the Administrative Tools folder.
2. Right-click the Active Directory Users and Computers icon and press Operations Master.
3. Select the appropriate tab for the role you wish to transfer, one by one (RID, PDC, Infrastructure), and press the Change button.
4. Press OK all the way out.
Transferring FSMO roles from the ntdsutil.command:
Caution: Using the ntdsutil incorrectly may result to loss Active Directory functionality. Be careful!
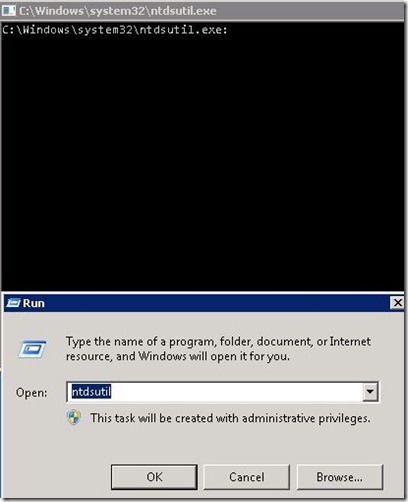
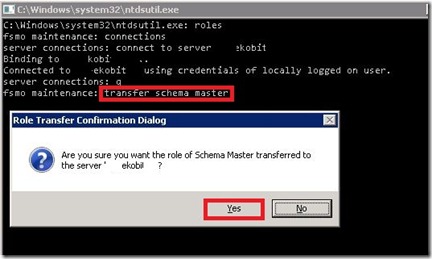
1. On domain controller, click Start, Run, type ntdsutil and click OK. The cmd will appear.
2. Type roles
3. Type connections
4. Type connect to server <servername>, where <servername> is the name of your domain controller you want to use.
5. Type q and then press Enter again.
6. Type transfer <role>, where <role> is the role you want to transfer.
An example; transfer schema master, transfer RID, and so on.
7. After you transfer all five roles, type q and press Enter until you quit ntdsutil.exe.
8. Restart the server.
That’s all for today!

