I believe in Hyper-V!

Online VHDX resize [WS2012R2 & W8.1 Preview]

One of the great new features in Windows Server 2012 R2 and Windows 8.1 Preview, actually in Hyper-V role, is online .VHDX resize. What does that mean for us? As headline said, now we have ability to increase and decrease the size of .VHDX files with no interruption of end users services.
NOTE: This new feature is limited to the new .VHDX format and isn’t available for the .VHD format.

As always, I’ll show you how to resize .VHDX in both ways and with many pictures ;)

Choose VM and press on Settings

1

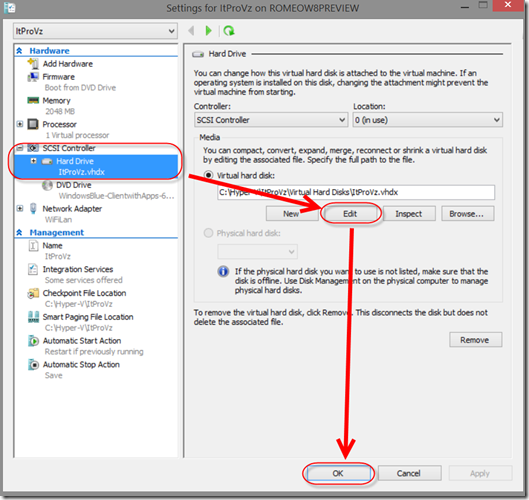
Select Hard Drive/Virtual hard disk and press on Edit

2

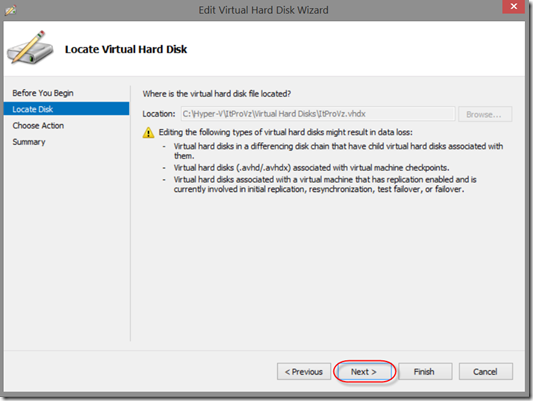
Under Locate Virtual Hard Disk window press Next

3

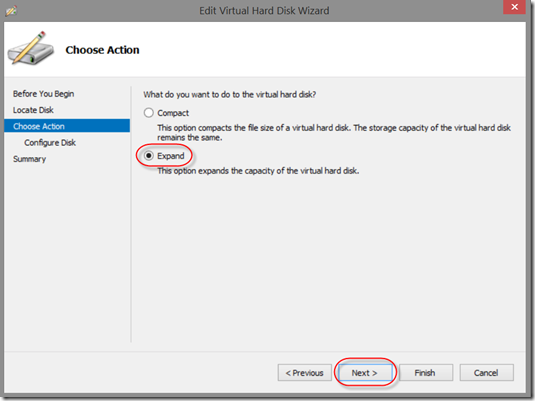
Select Expand and press Next

4

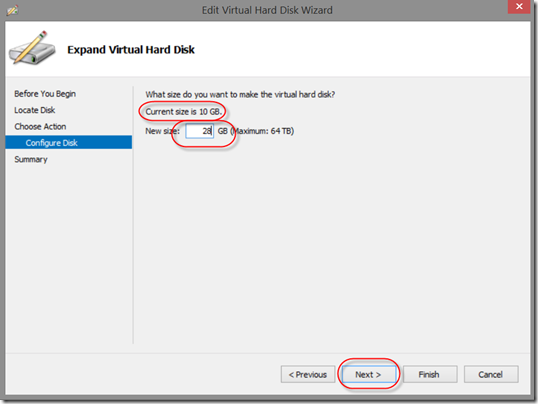
Enter new disk size and press Next

5

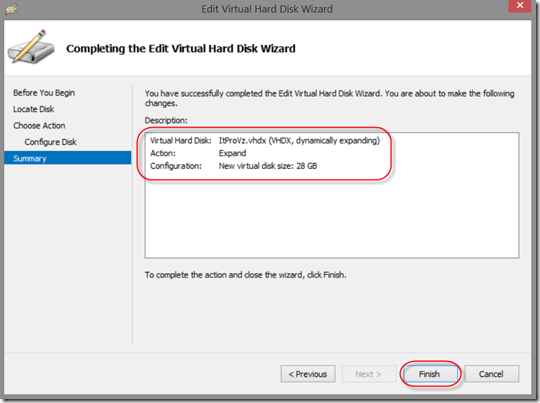
Check settings under Description and click on Finish

7

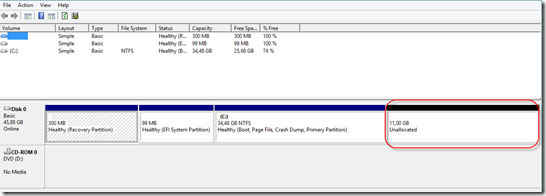
Logon into VM, open Disk Management and you will see Unallocated space

8

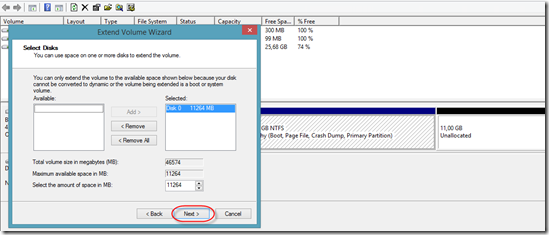
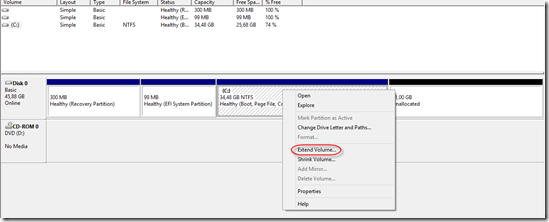
Now you can Extend volume to Unallocated space
9

10

And voila. Now we have a bigger disk

11

Ok, through the pictures above we showed how to extend virtual hard drive.


Now I’ll show you how to decrease virtual hard disk. Please note that the VM is running all the time!

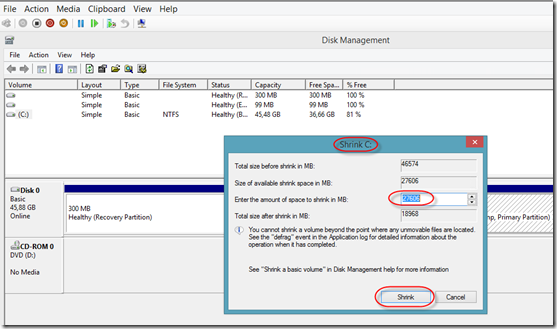
Open Disk Management on VM, select Shrink, enter the amount of space to shink and click on Shrink.

12

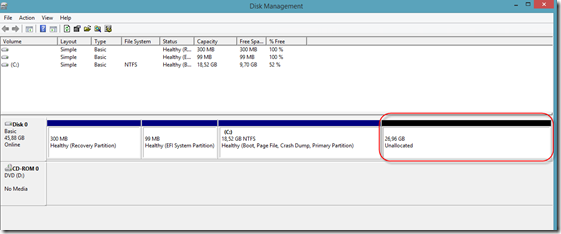
Now we have 26GB of Unallocated/free space on virtual hard disk

13

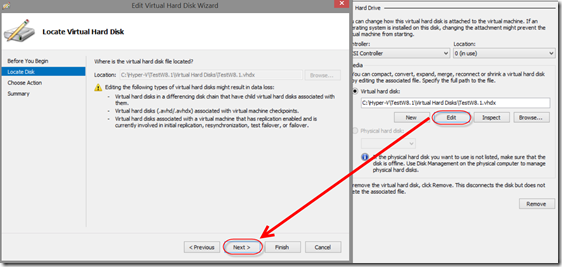
Open VM setting, go to virtual hard disk and press Edit, than press on Next

14

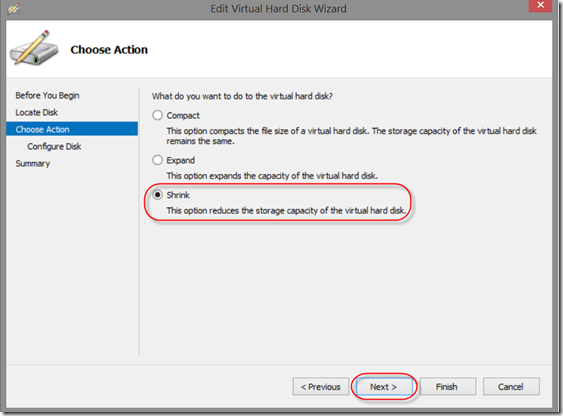
Select Shrink then press on Next

15

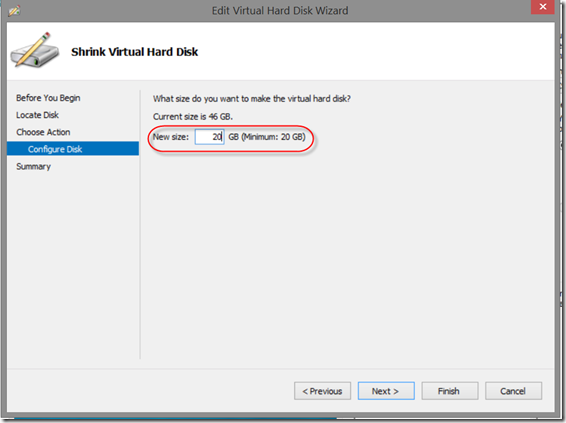
Under Shrink Virtual Hard Disk enter new virtual disk size and press on Next

17

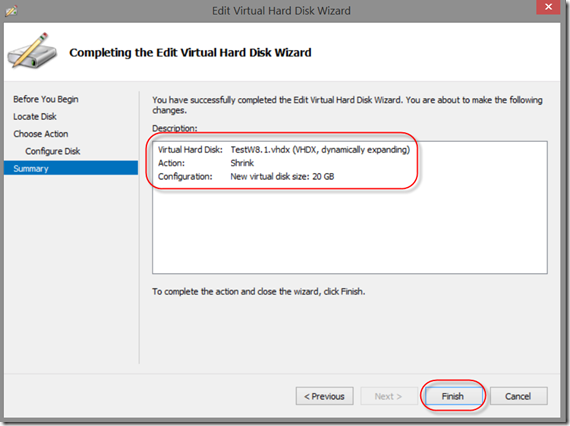
Check description and click on Finish

18

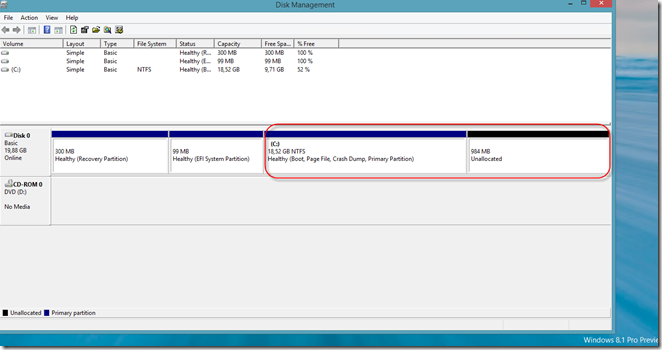
As you can see in the picture below we have smaller virtual hard drive ;) For me personally this is one of the coolest feature in WS2012 R2 Hyper-V, behind USB pass-through, full Remote Desktop, automatic activation of VMs, Gen 2VMs etc…. :)

19

Today is a Friday, the last working day of the week. No big deal, but from today after work I’m on a vacation. In the last eleven months I have worked very hard and now deserve a break/vacation with my family.
Sea, see you tomorrow!

Cheers,

Romeo

Virtual Machine failed to start/create/take snapshot etc…

Few months ago I wrote about issues with virtual machines on my laptop. Also, I had issues with virtual machines on my domain. I would like to explain my environment and what happened with virtual machines on Hyper-V domain member hosts. On each Hyper-V host I have approximately 12-15 VMs with local storage and one System Center SP1 Virtual Machine Manager for management. All VMs run smoothly, but when I need to create new virtual machine, take checkpoint (snapshot), migrate, start, etc… job failed, even I do that through VMM or Hyper-V Manager console. When I restart Hyper-V service on Hyper-V host everything works fine some time, but when you need restart Hyper-V service from time to time, especially if you manage Hyper-V server from VMM or from a central location that can be very annoying. So, where is the catch? (in my case, but I heard that many of my colleagues have same or similar issues.).

One of examples

1

Log on into domain controller, open Group Policy Management and create new Group Policy Object (GPO) under Group Policy Object container. You can call him whatever you want.

2

After you create new GPO click on Edit, new window will appear.

3
4

Now, expand Computer Configuration –> Policies –> Windows Settings –> Security Settings –> Local Policies –> User Rights Assignment. On the right side open Allow log on locally tick on Define these policy settings and Add User or Group. I added Administrators, Hyper-V host administrators and VMM administrator.

5

After you are done, close Group Policy Management Editor and link newly created GPO to the Hyper-V hosts Organizational Unit.

6

On domain controller and Hyper-V hosts open command prompt and type gpupdate /force.

7

We are done!

Enjoy,

Romeo

Install Microsoft .Net Framework 3.5 “offline” in Windows 8

Many times until now I had issues with .Net Framework 3.5 installation on Windows 8. Every time when I installed .Net Framework 3.5 on Windows 8 I needed to bing-it to find resolution, so now I want to have reminder on my blog :).

Why do we need .Net Framework 3.5? Sometimes we use some updated program, Apps, etc. (Last time when I had a problem I installed Team Foundation Server 2012 Build server). To install it online we have to do a huge amount of download from Internet (if you have a lucky with this kind of installation, I didn’t have).

Step 1.

Insert Windows 8 boot media into PC
Capture3

Step 2.

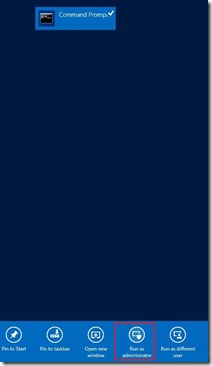
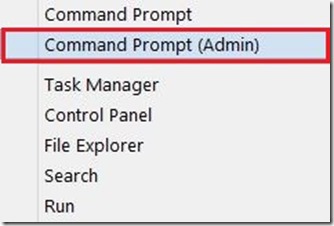
Open Command Prompt (Run as administrator) or (Admin)
Capture4 Capture5

Step 3.

Copy the following line and paste on to Command Prompt (opened with Admin rights) window then press Enter.

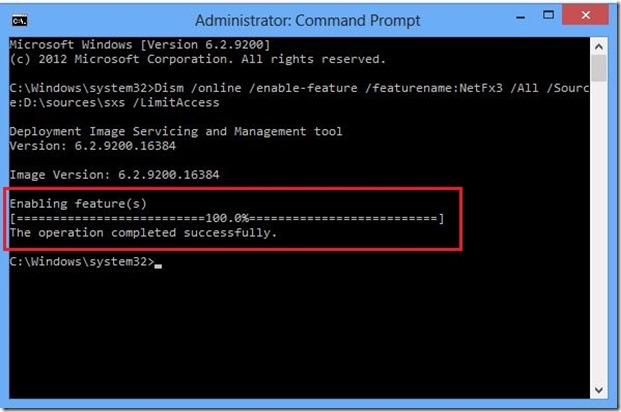
Dism /online /enable-feature /featurename:NetFx3 /All /Source:D:\sources\sxs /LimitAccess

Capture

After very short time you’ll have .Net Framework 3.5 installed on your PC.

Capture2

NOTE: Why this is happening? Actually, when we install .Net Framework 3.5 through Windows 8 features, Turn Windows features on or off, Windows needs to download .Net Framework files. But, when we have WSUS on our domain Windows requires this files from WSUS not from Windows online updates, given that WSUS doesn’t have such files in the repository and we get error when try to install .Net Framework.

Enjoy ;)

Romeo